You just downloaded TimeNet Law. Let's get you from zero to your first professional invoice in about 90 seconds. No joke — this is the fastest setup in legal billing.
The Setup Wizard
When you first launch TimeNet Law, a 4-step Setup Wizard guides you through the essentials. It takes about 30 seconds.
Step 1: Your Firm Information (Page 1 of 4)
Enter your firm name, address, phone, and email. This information appears on every invoice.
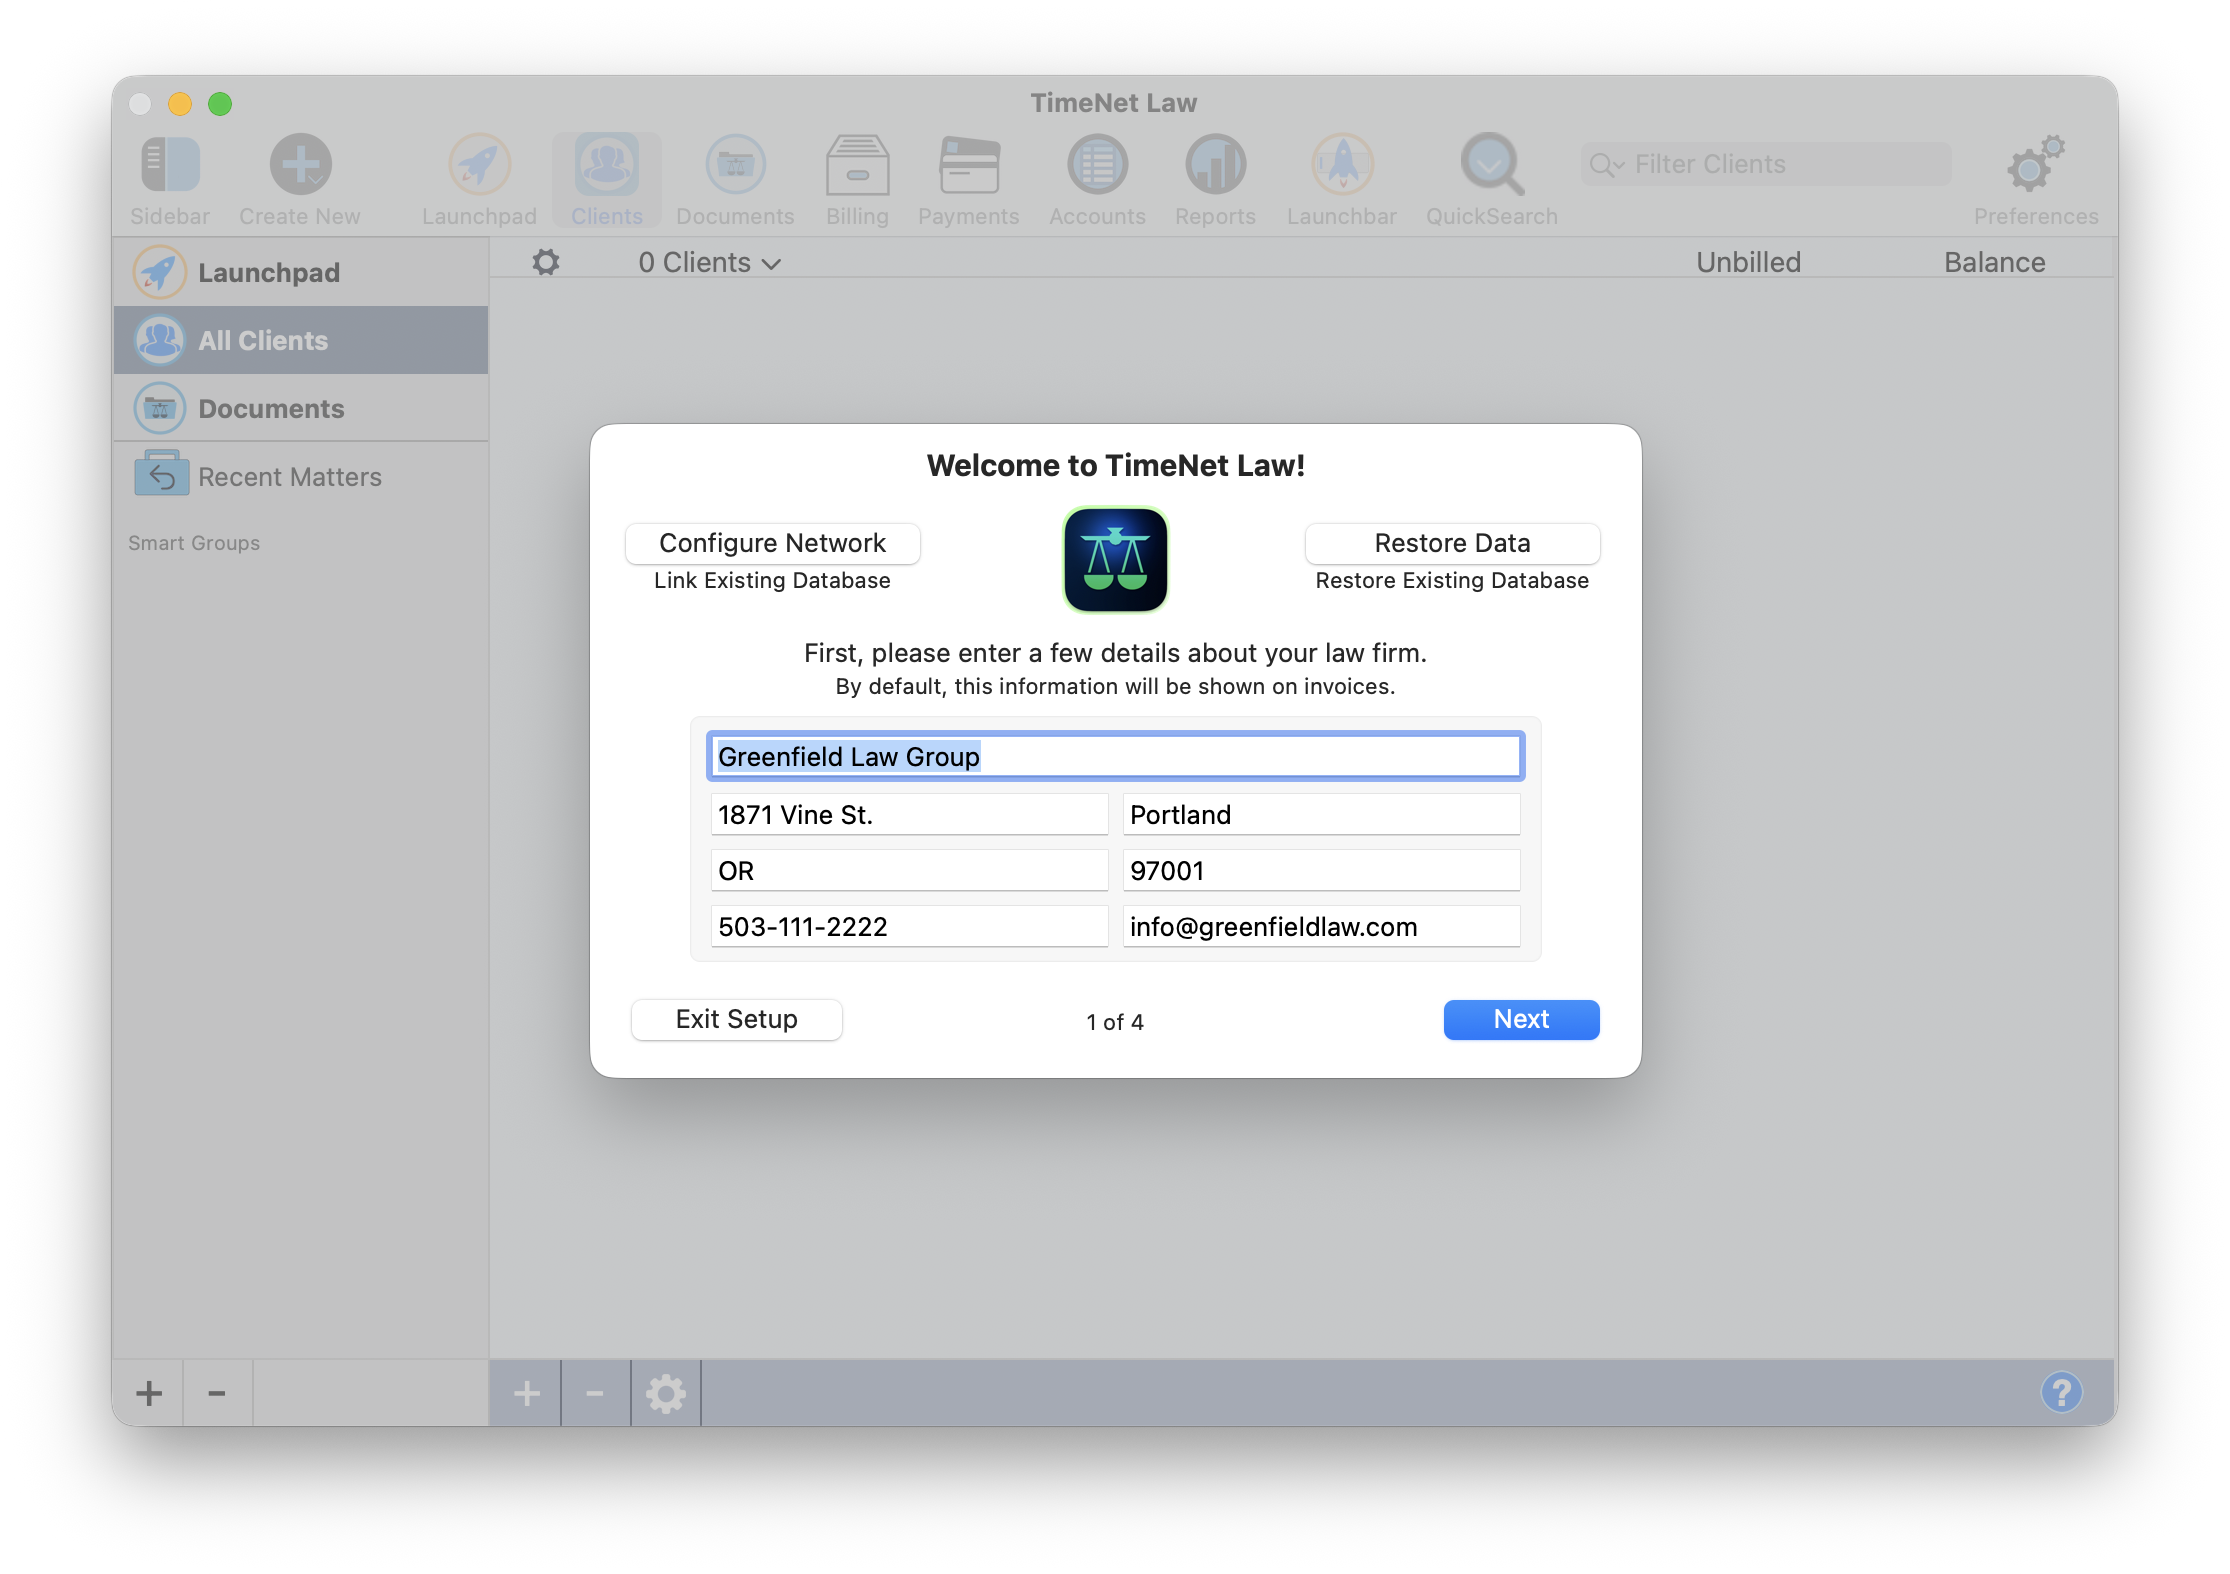
The Setup Wizard — page 1 of 4. Your firm information appears on every invoice.
Step 2: Your Timekeeper & Billing Rate (Page 2 of 4)
Enter your name (or your first timekeeper's name) and hourly billing rate. Choose your preferred time entry format — Tenths (1.2 hours) or Hours:Minutes (1:12).
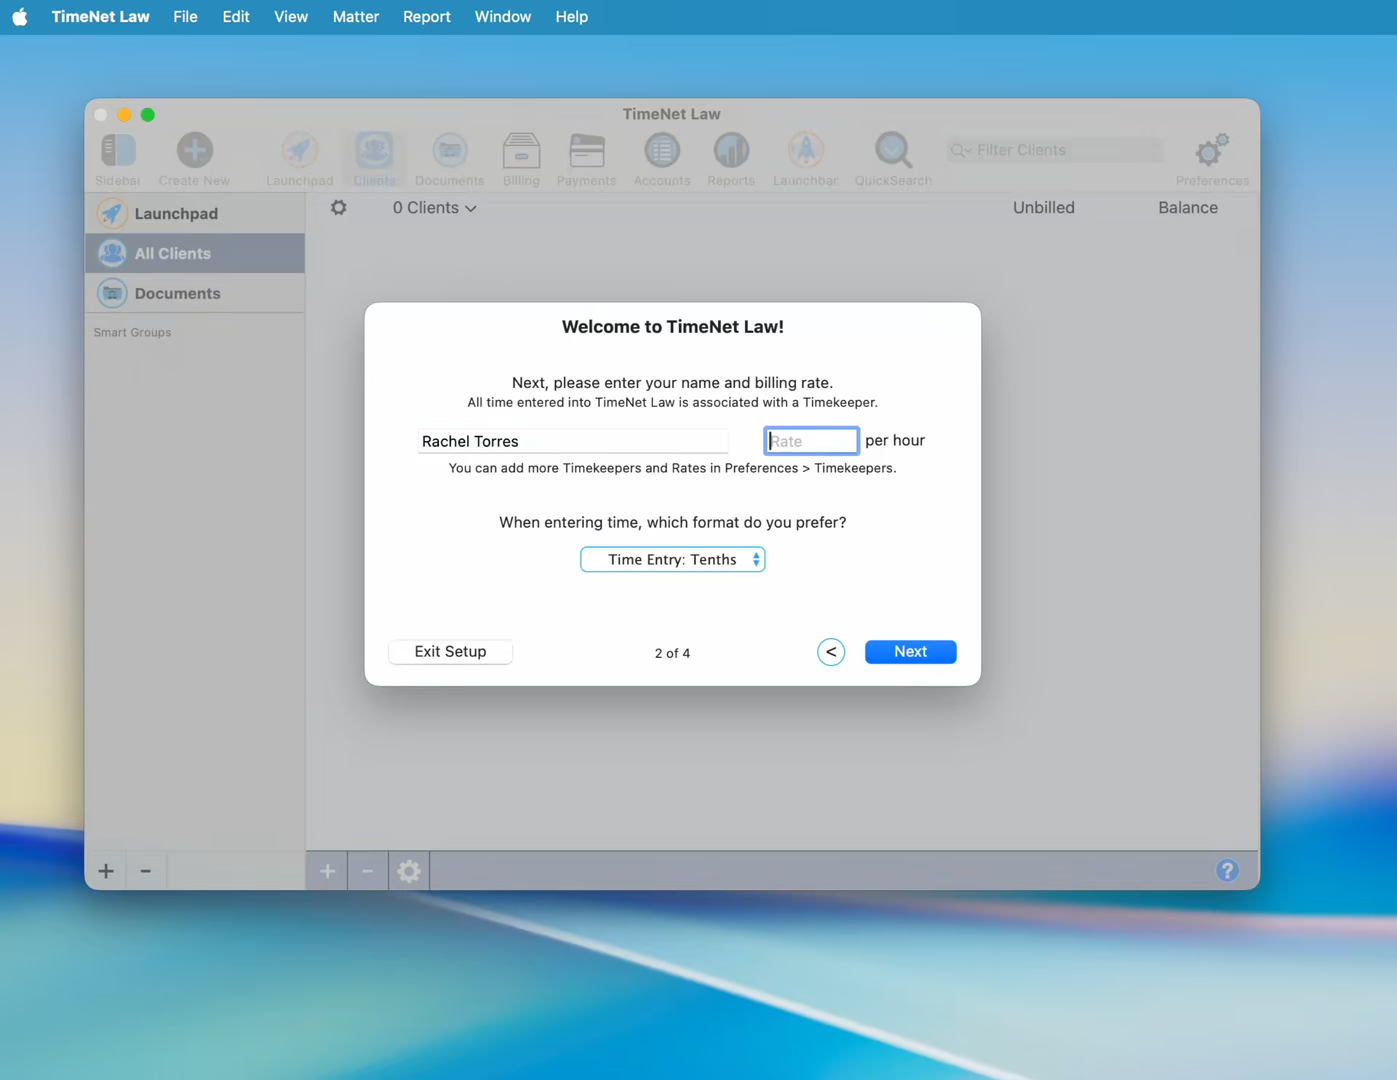
Page 2 — set your name and billing rate. You can add more timekeepers later in Preferences → People & Fees.
You can add additional timekeepers later in Preferences → People & Fees. Each timekeeper can have their own billing rate.
Step 3: Your Logo (Page 3 of 4)
Add your firm's logo so it appears on every invoice. Click the drop zone or drag an image file directly into it. This is completely optional — you can always add or change your logo later in Preferences → Firm ID.
Page 3 — click or drag your firm logo into the drop zone.
Once added, your logo appears with alignment controls — position it left, center, or right on your invoices.
Logo added. Use the alignment buttons to position it on your invoices.
Step 4: You're Ready to Go! (Page 4 of 4)
The final page shows you exactly where your data lives and confirms automatic backups are enabled. Your database path is shown right there — no guessing where your files are stored.
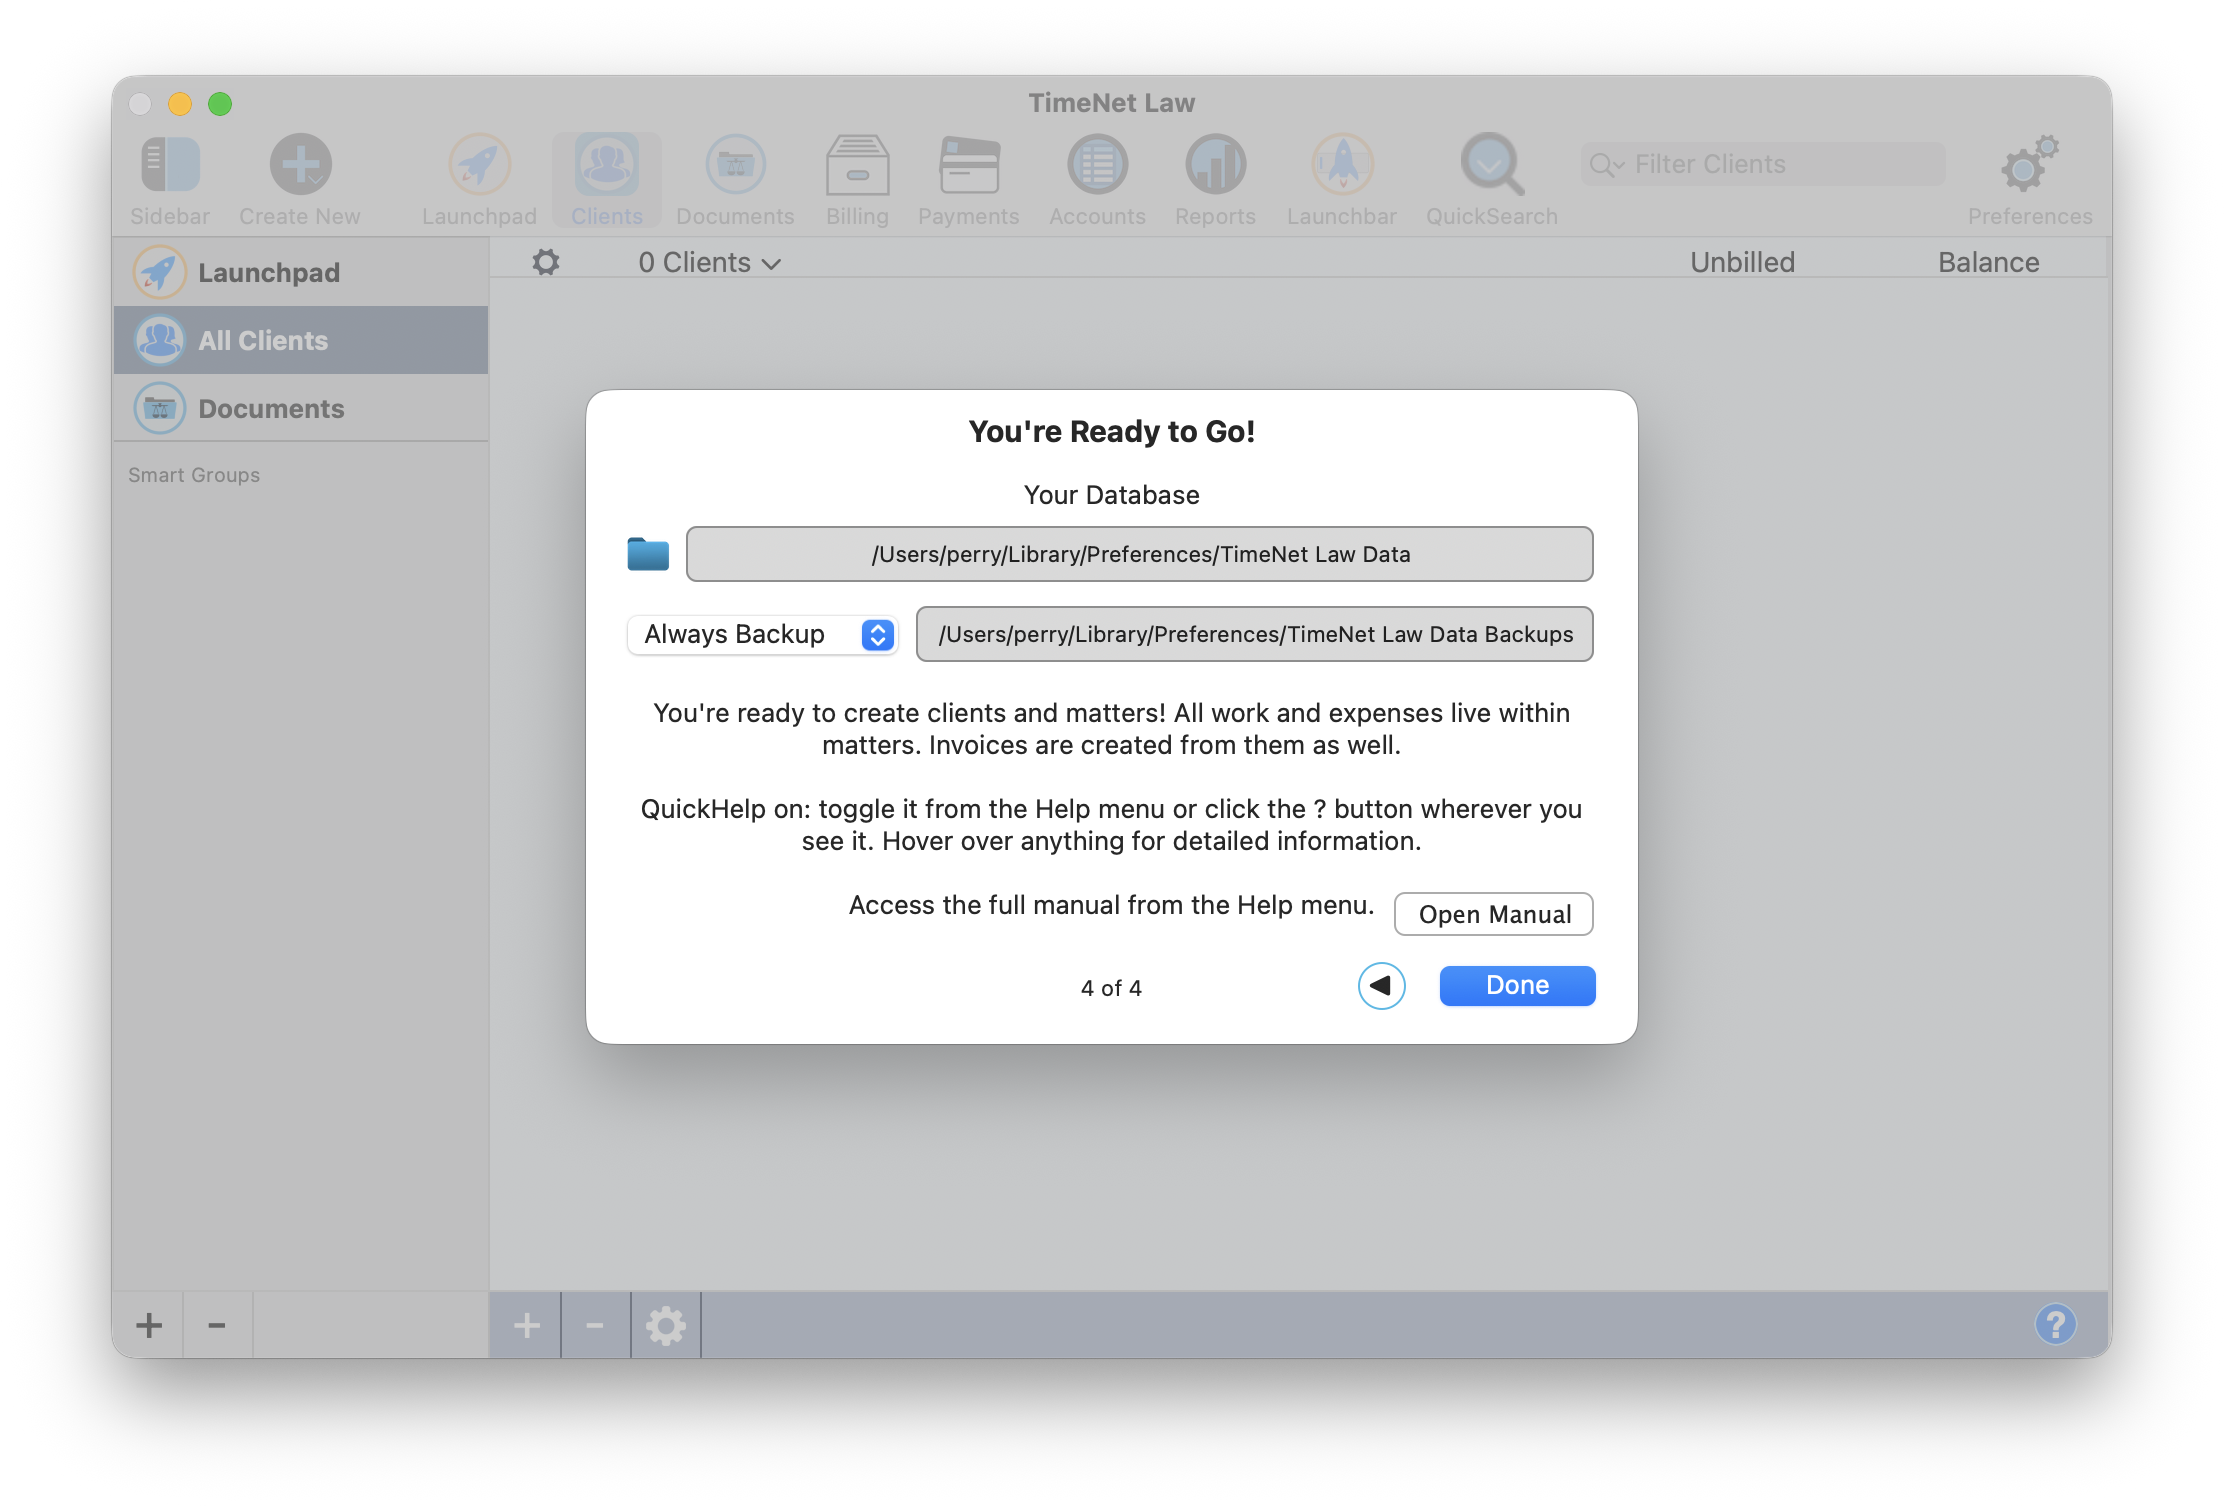
Page 4 — your database location, backup settings, and helpful orientation tips.
Create Your First Client
After the wizard, you'll see the main window with "0 Clients" and a New Client button.
Click New Client
Click New Client in the main window (or go to File → New Client).
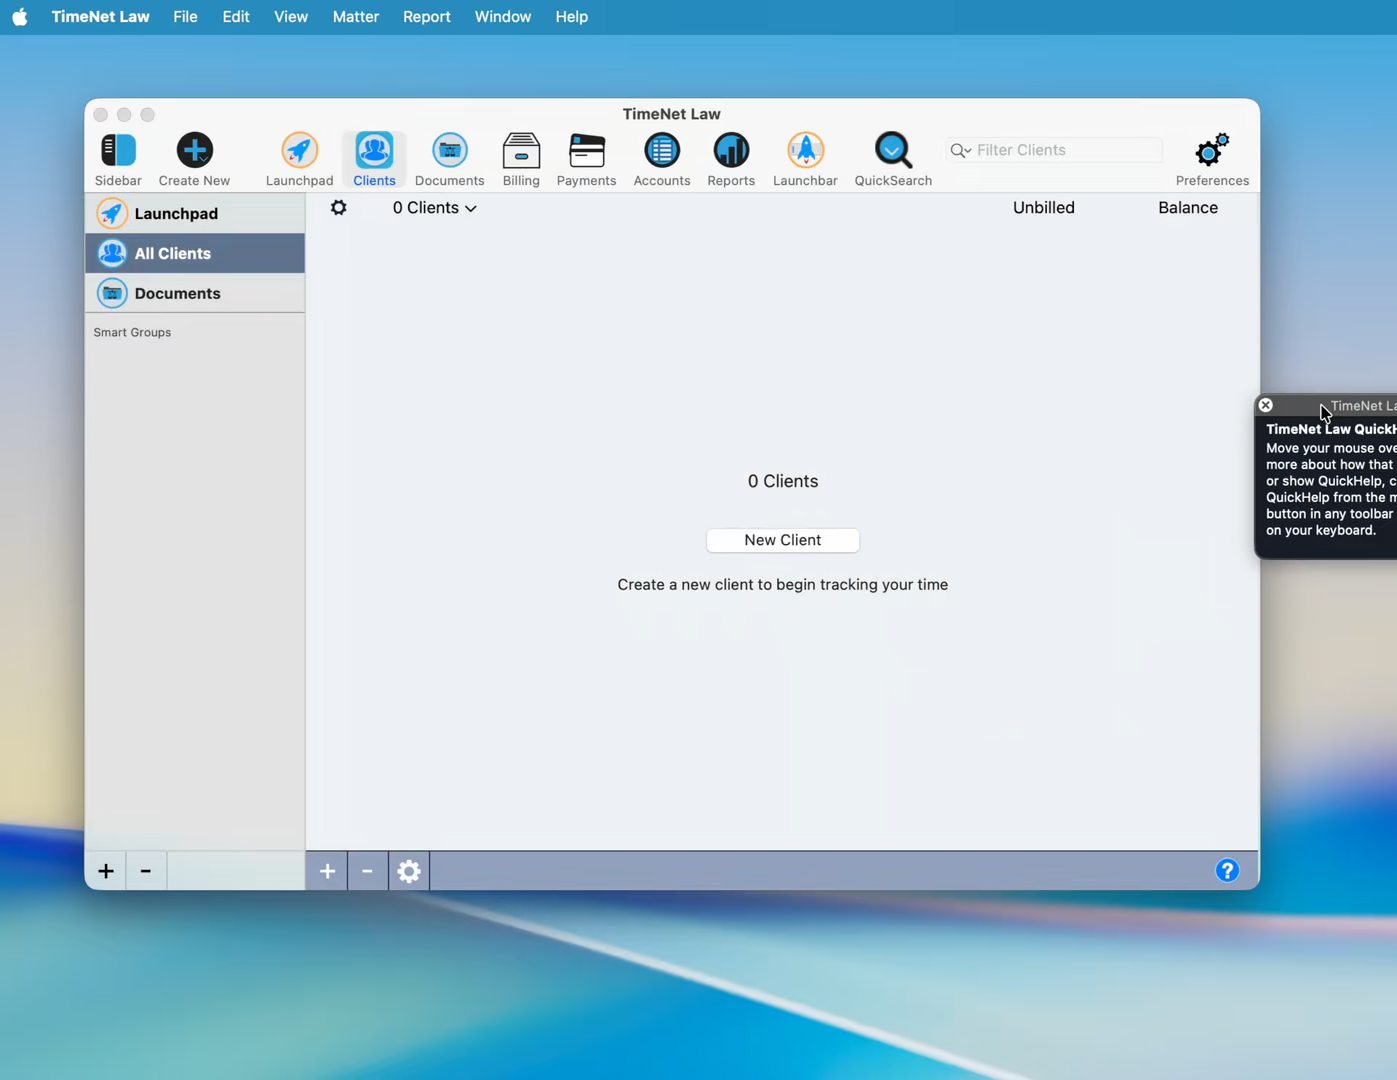
The main window after setup — click New Client to get started.
Fill in the Client Details
Enter the client information:
Name — the client's name (required)
Code — auto-generated from the name (e.g., "MS" for Mike Smith)
Address — appears on invoices
The Billing tab at the bottom shows rate settings. The default rate from your timekeeper setup is already applied. Click Create Client when done.

The New Client window. Enter the name and address at minimum — everything else can come later.
Create a Matter
Every client needs at least one matter. A matter is a case, project, or engagement you're tracking. After creating a client, click the New Matter button that appears.
Enter the Matter Name and Create
Enter the matter name (e.g., "Business Partnership") and click Create. The matter is automatically linked to the client. Optional fields include Matter Group, Balance Forward, and Practice Area.
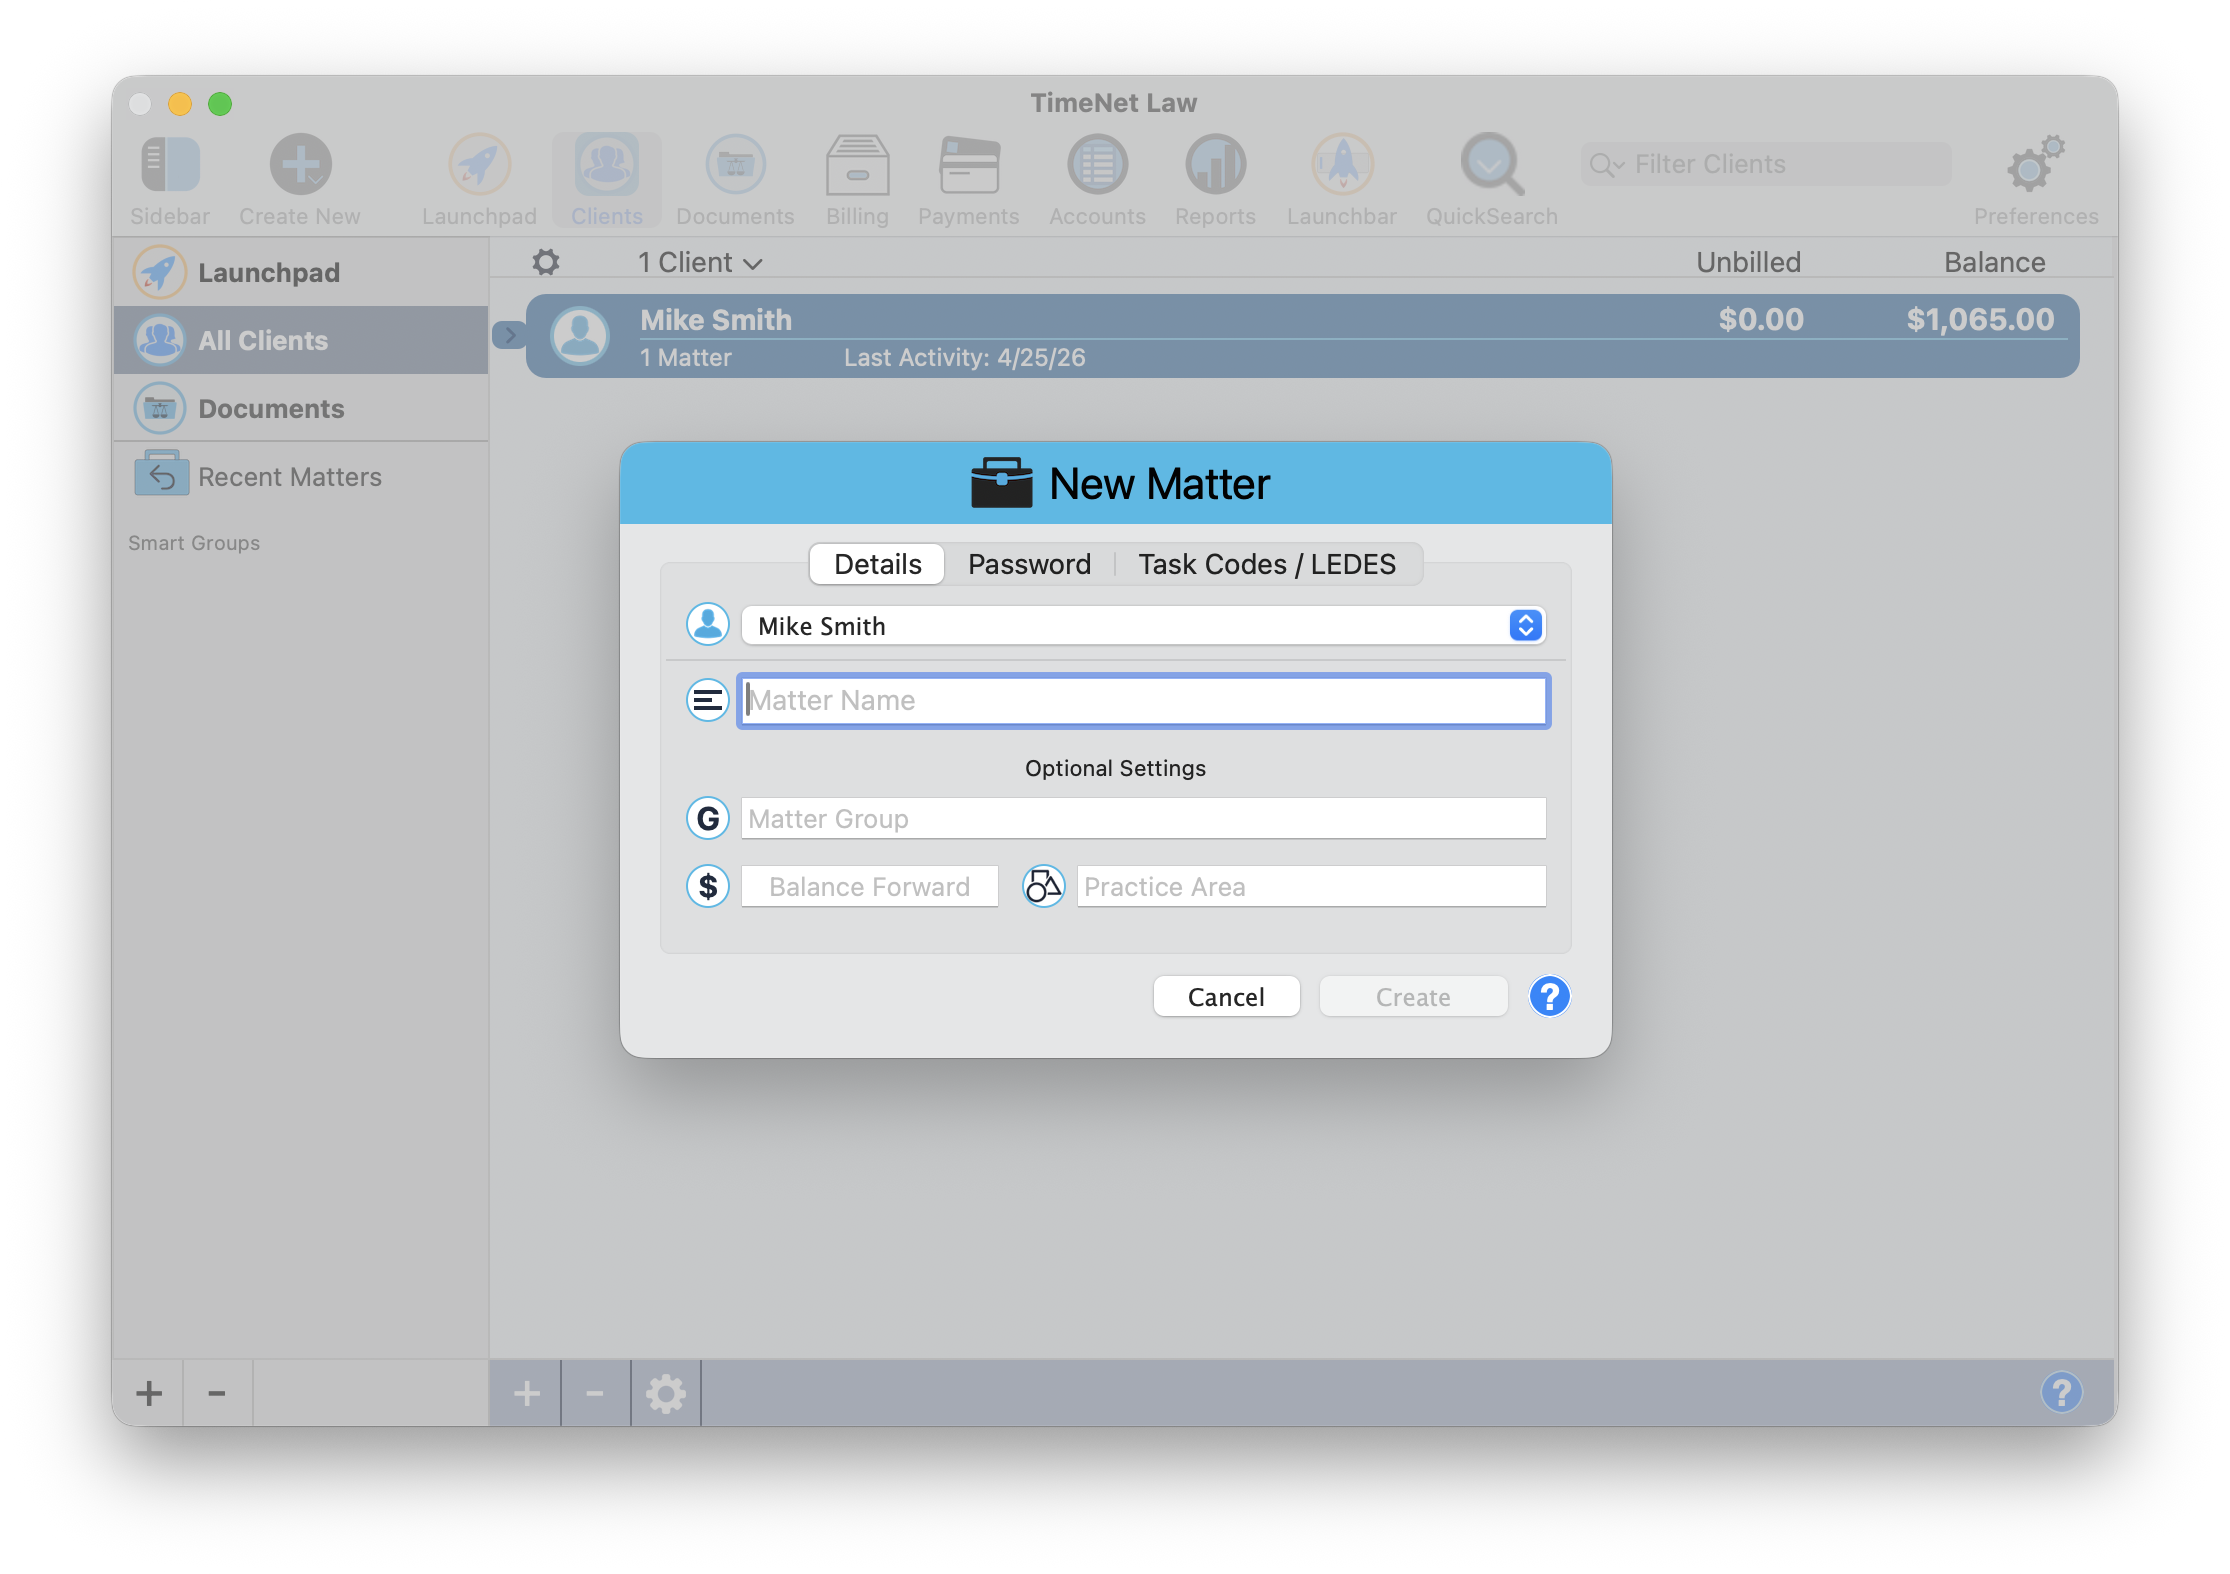
The New Matter window — just enter a name and click Create. Everything else is optional.
After clicking Create, the matter window opens. This is your workspace — you'll see the matter toolbar with New Entry, Start Timer, Payments, Create Invoice, and more.
The matter window — your workspace for tracking time, fees, and creating invoices.
Track Your Time
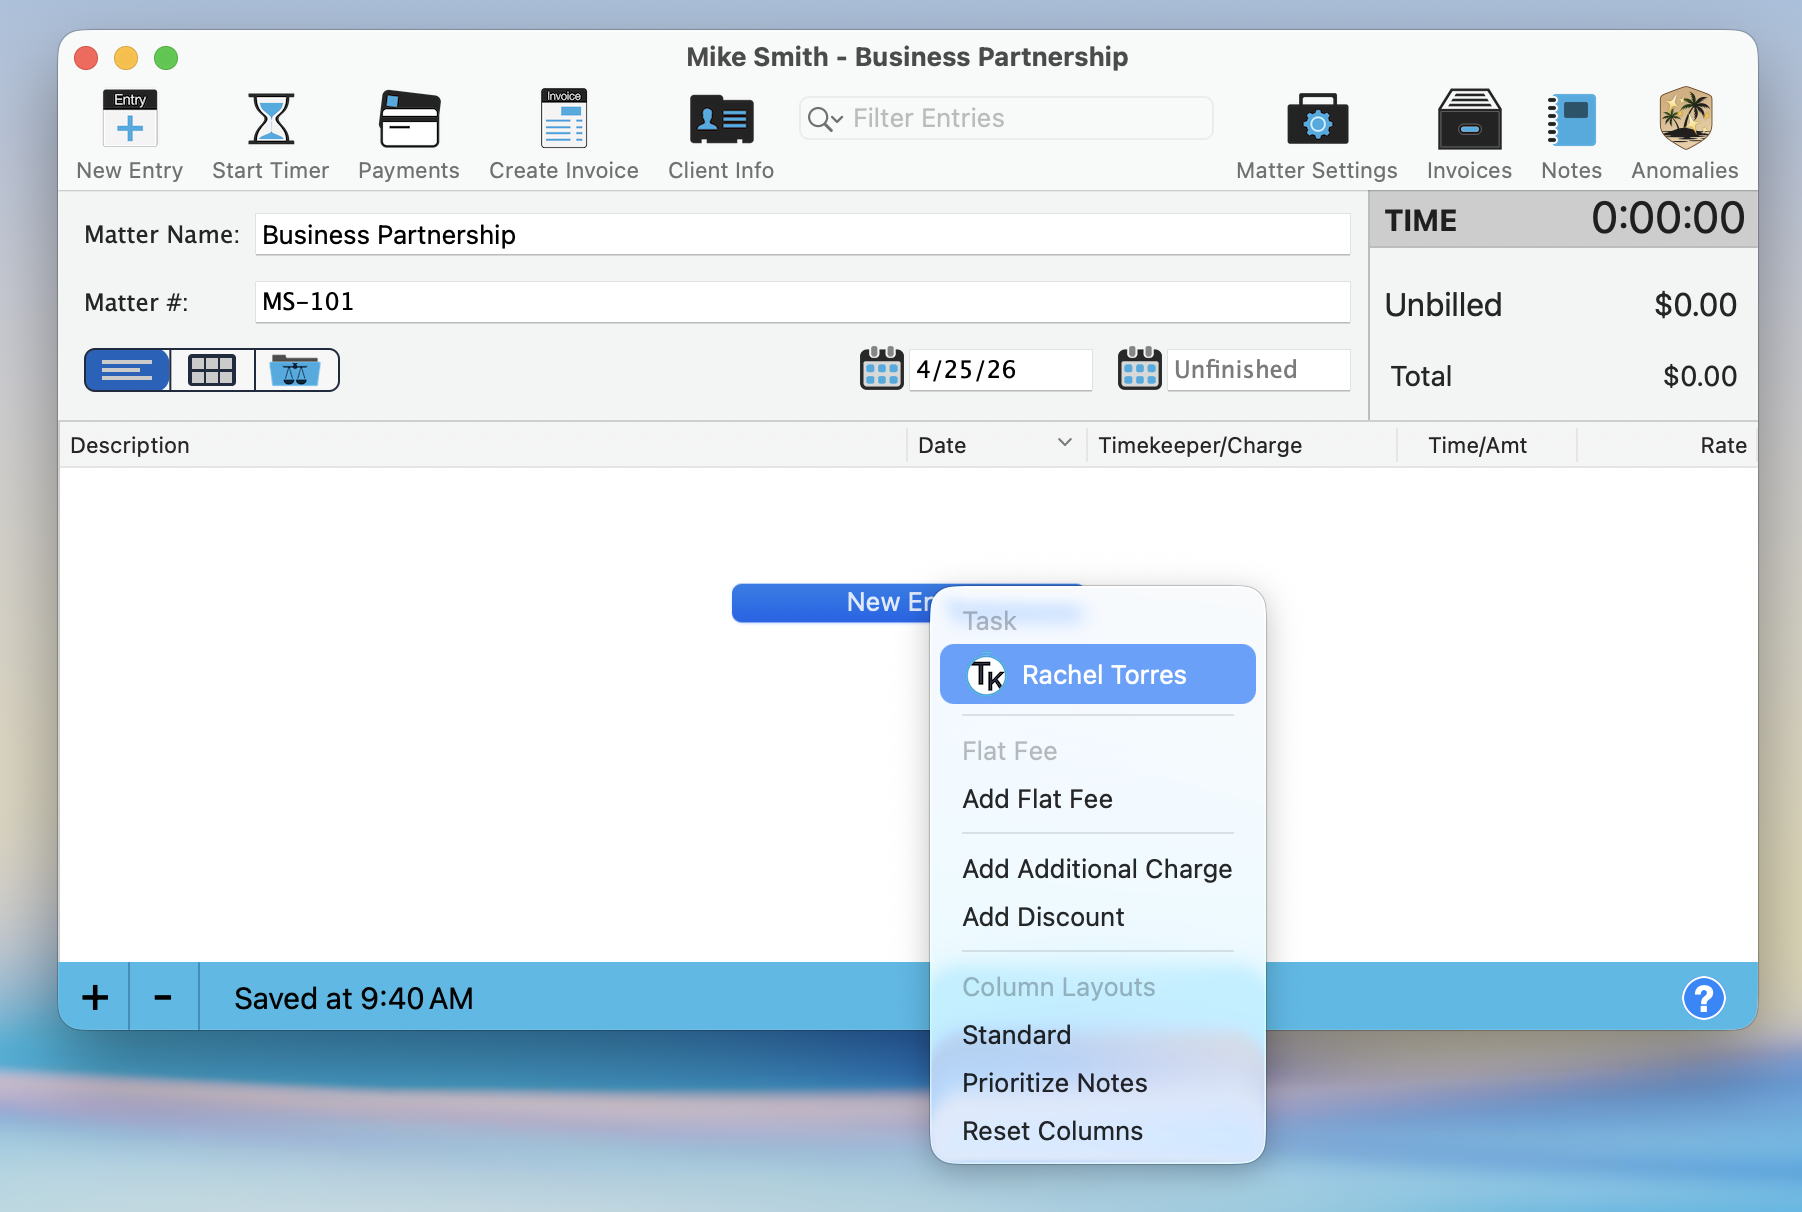
Click the New Entry dropdown in the matter toolbar and select your timekeeper name.
The entry form opens with:
- Description at the top — what you did (e.g., "Draft Document")
- Timekeeper — pre-selected
- Date and time — auto-filled
- Hours — enter the time spent (e.g., 1.2 for 1 hour 12 minutes in Tenths format)
- Notes — additional detail (e.g., "Prepare business partnership contract draft")
- Rate — shows your billing rate (e.g., $325.00/hr)
The total calculates automatically (1.2 hrs × $325 = $390.00). Click OK to save.
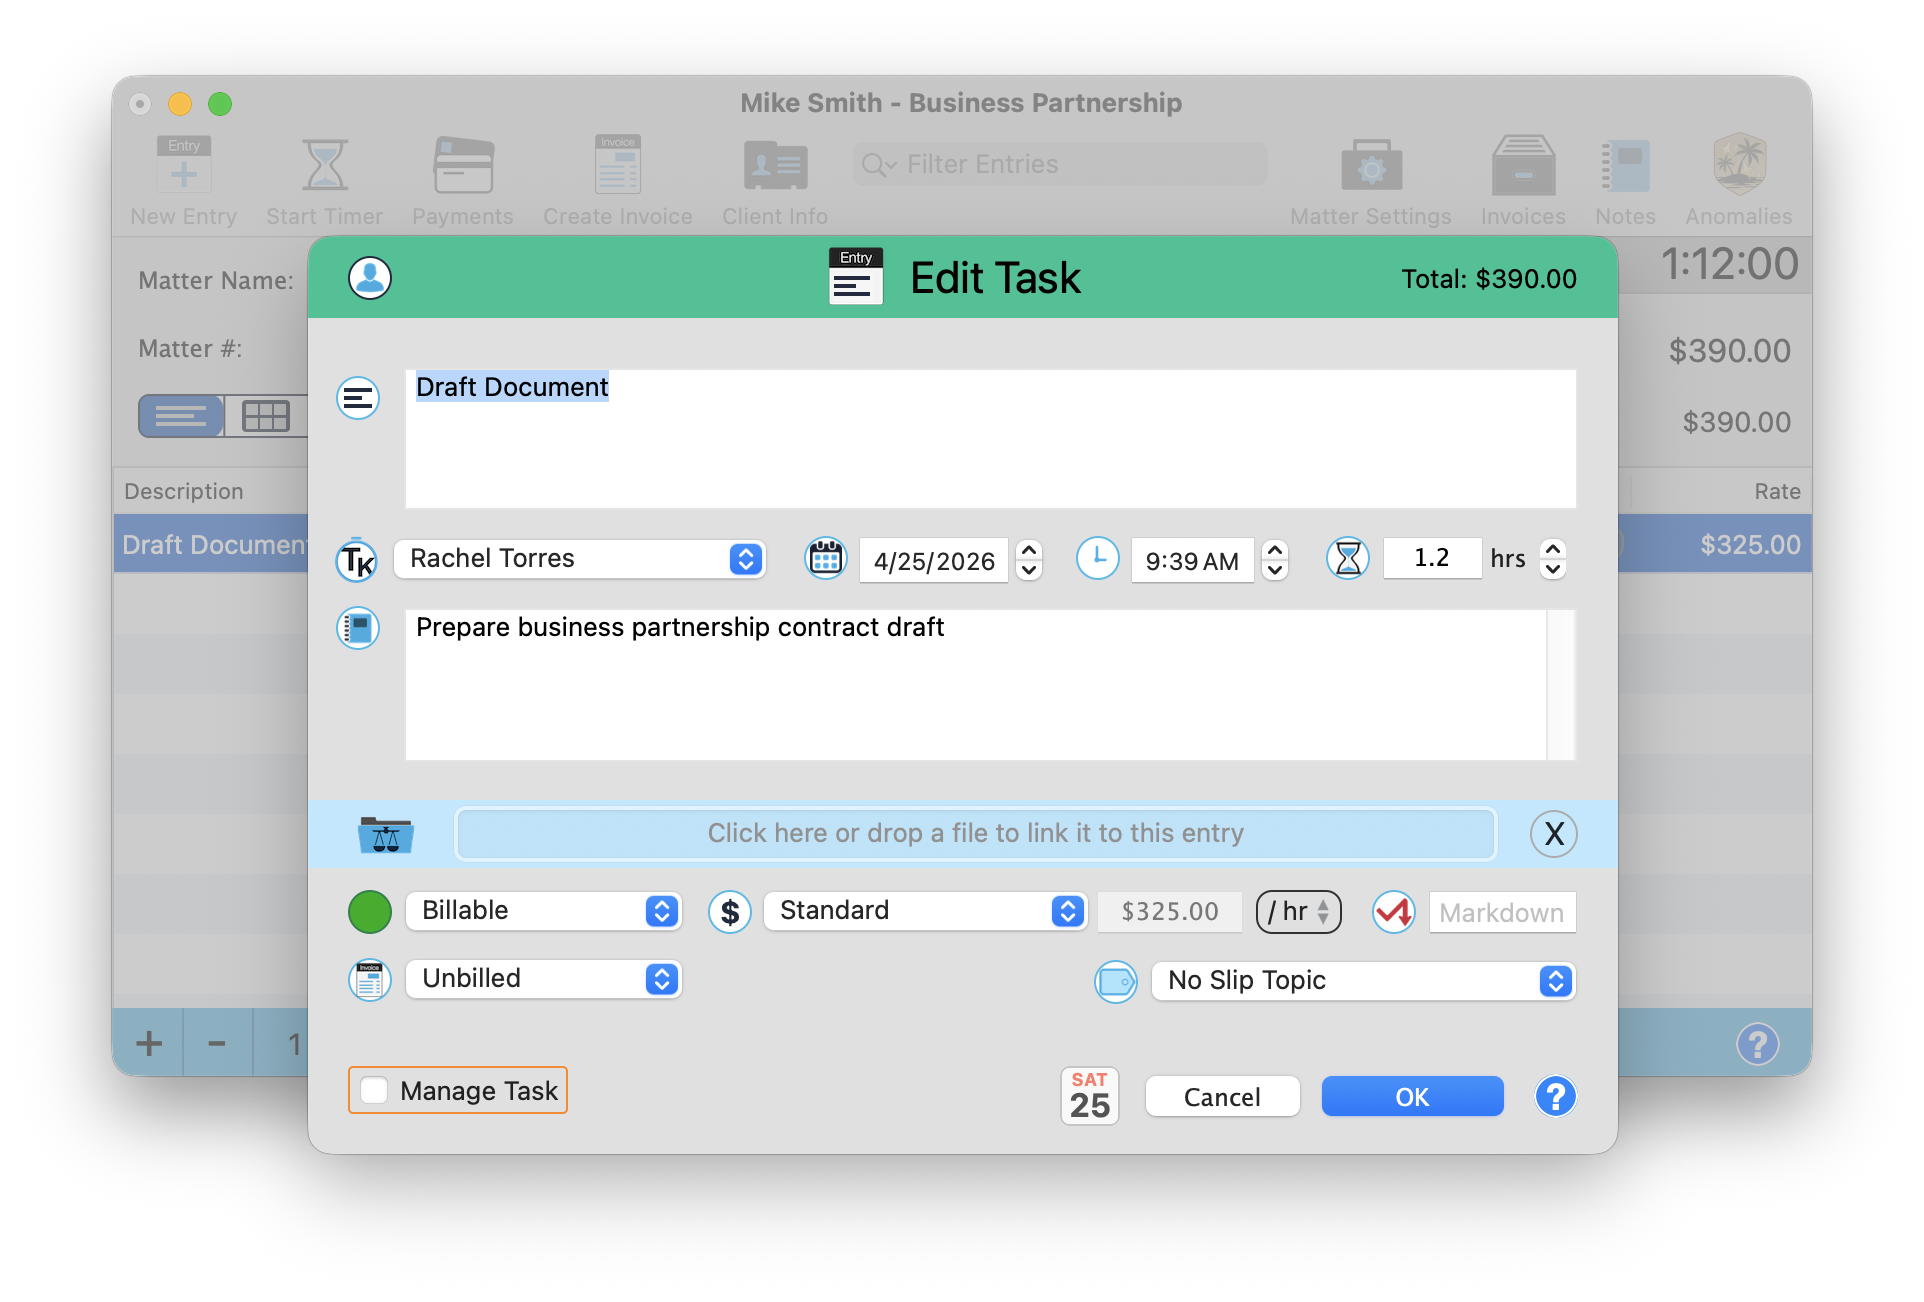
A time entry — enter the description, hours, and notes. The total calculates automatically from your rate.
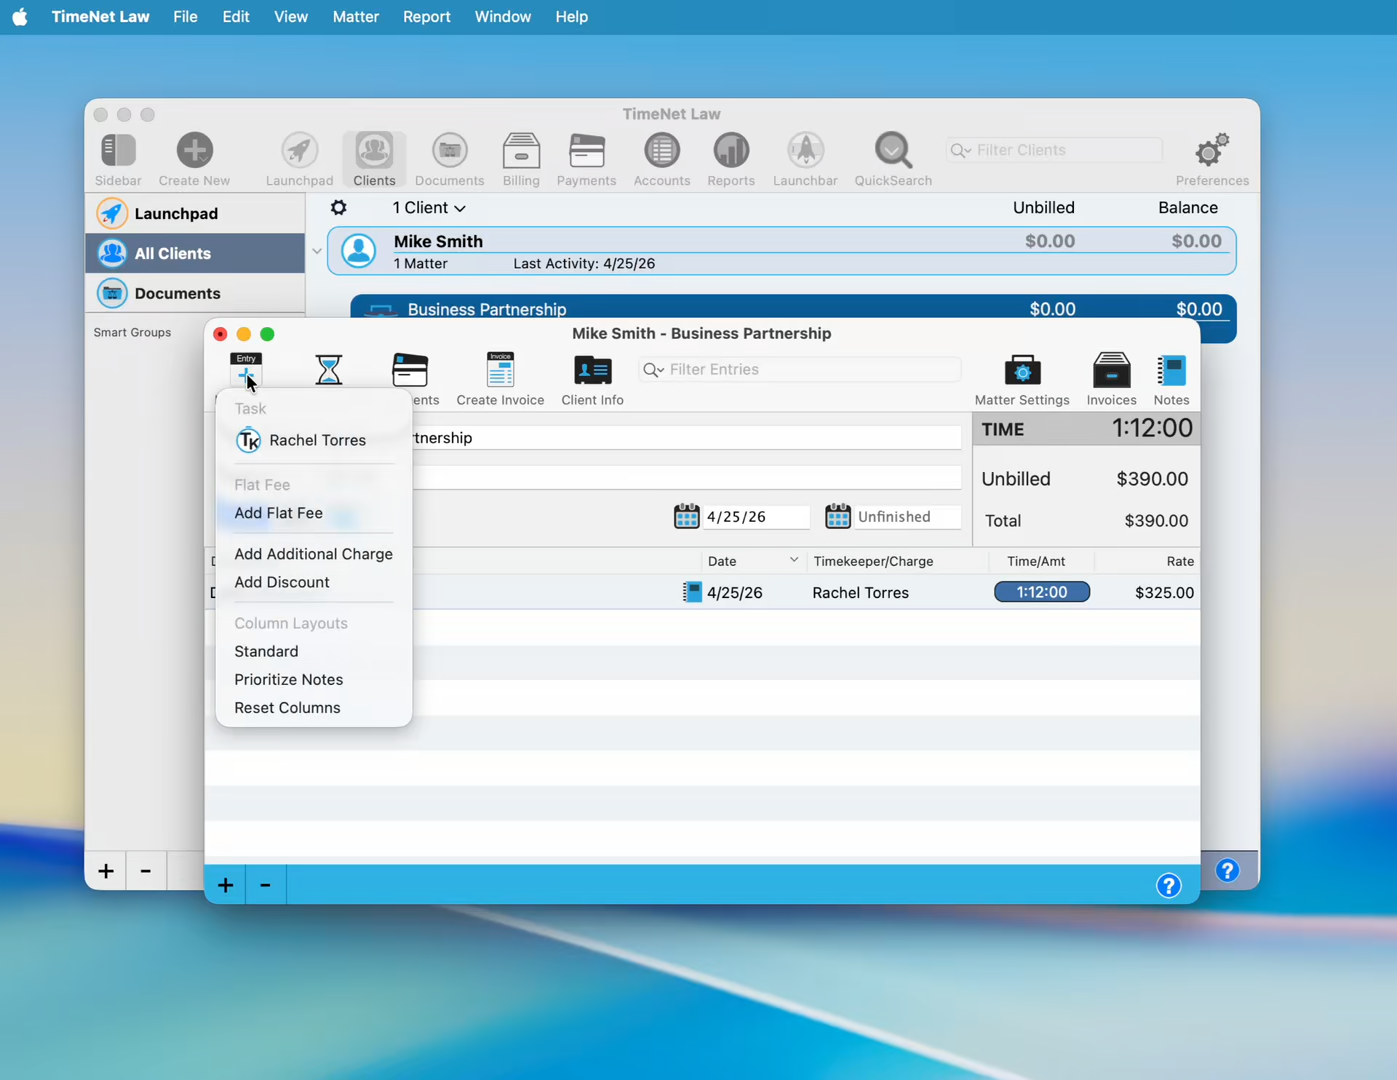
Add a Flat Fee
Not everything is billed by the hour. To add a flat fee, click the New Entry dropdown and select Add Flat Fee.
Enter:
- Fee Name (e.g., "LLC Filing")
- Amount (e.g., $675.00)
- Quantity (default: 1)
Click OK to save.
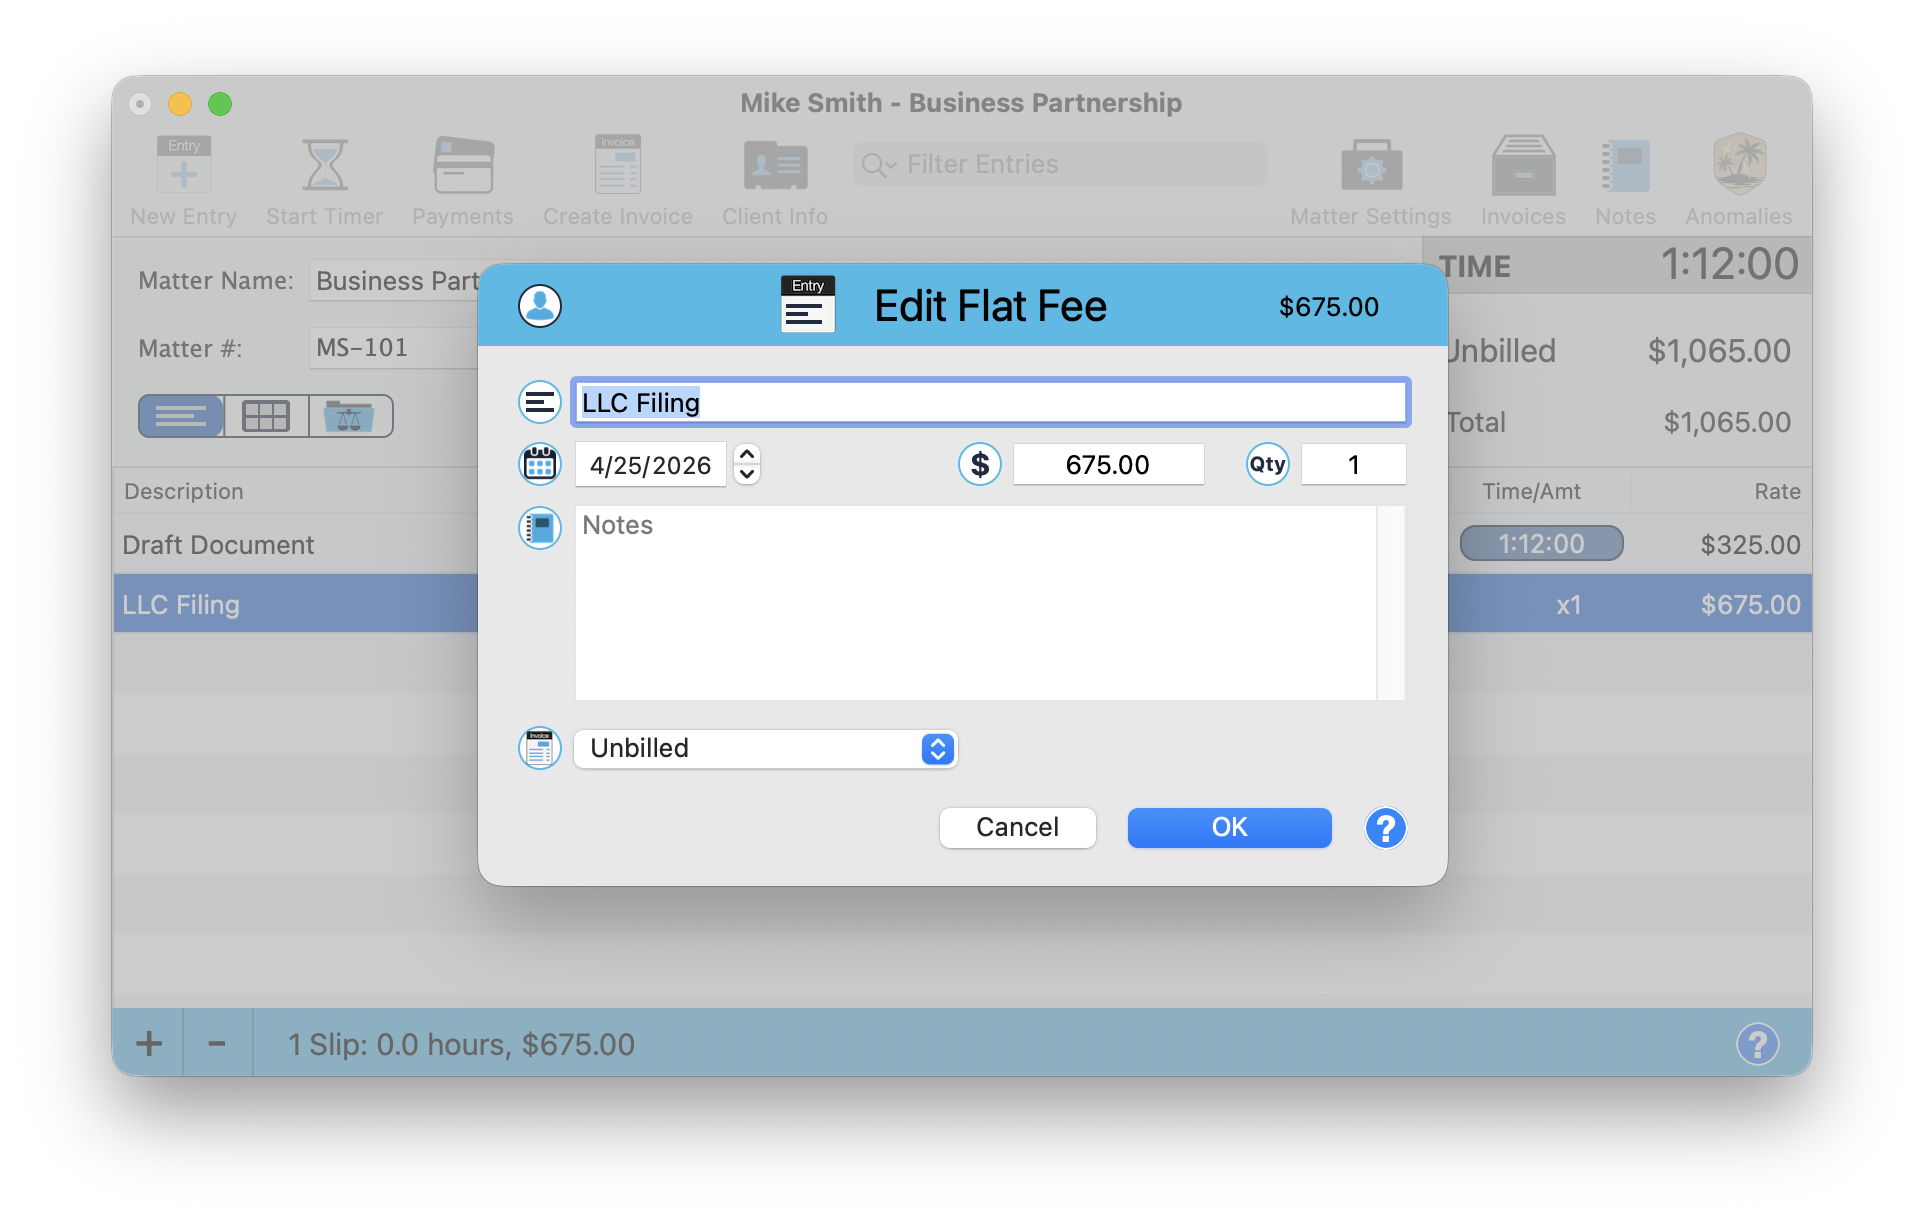
A flat fee entry — enter the name, amount, and quantity. Perfect for filing fees, retainers, or fixed-price services.
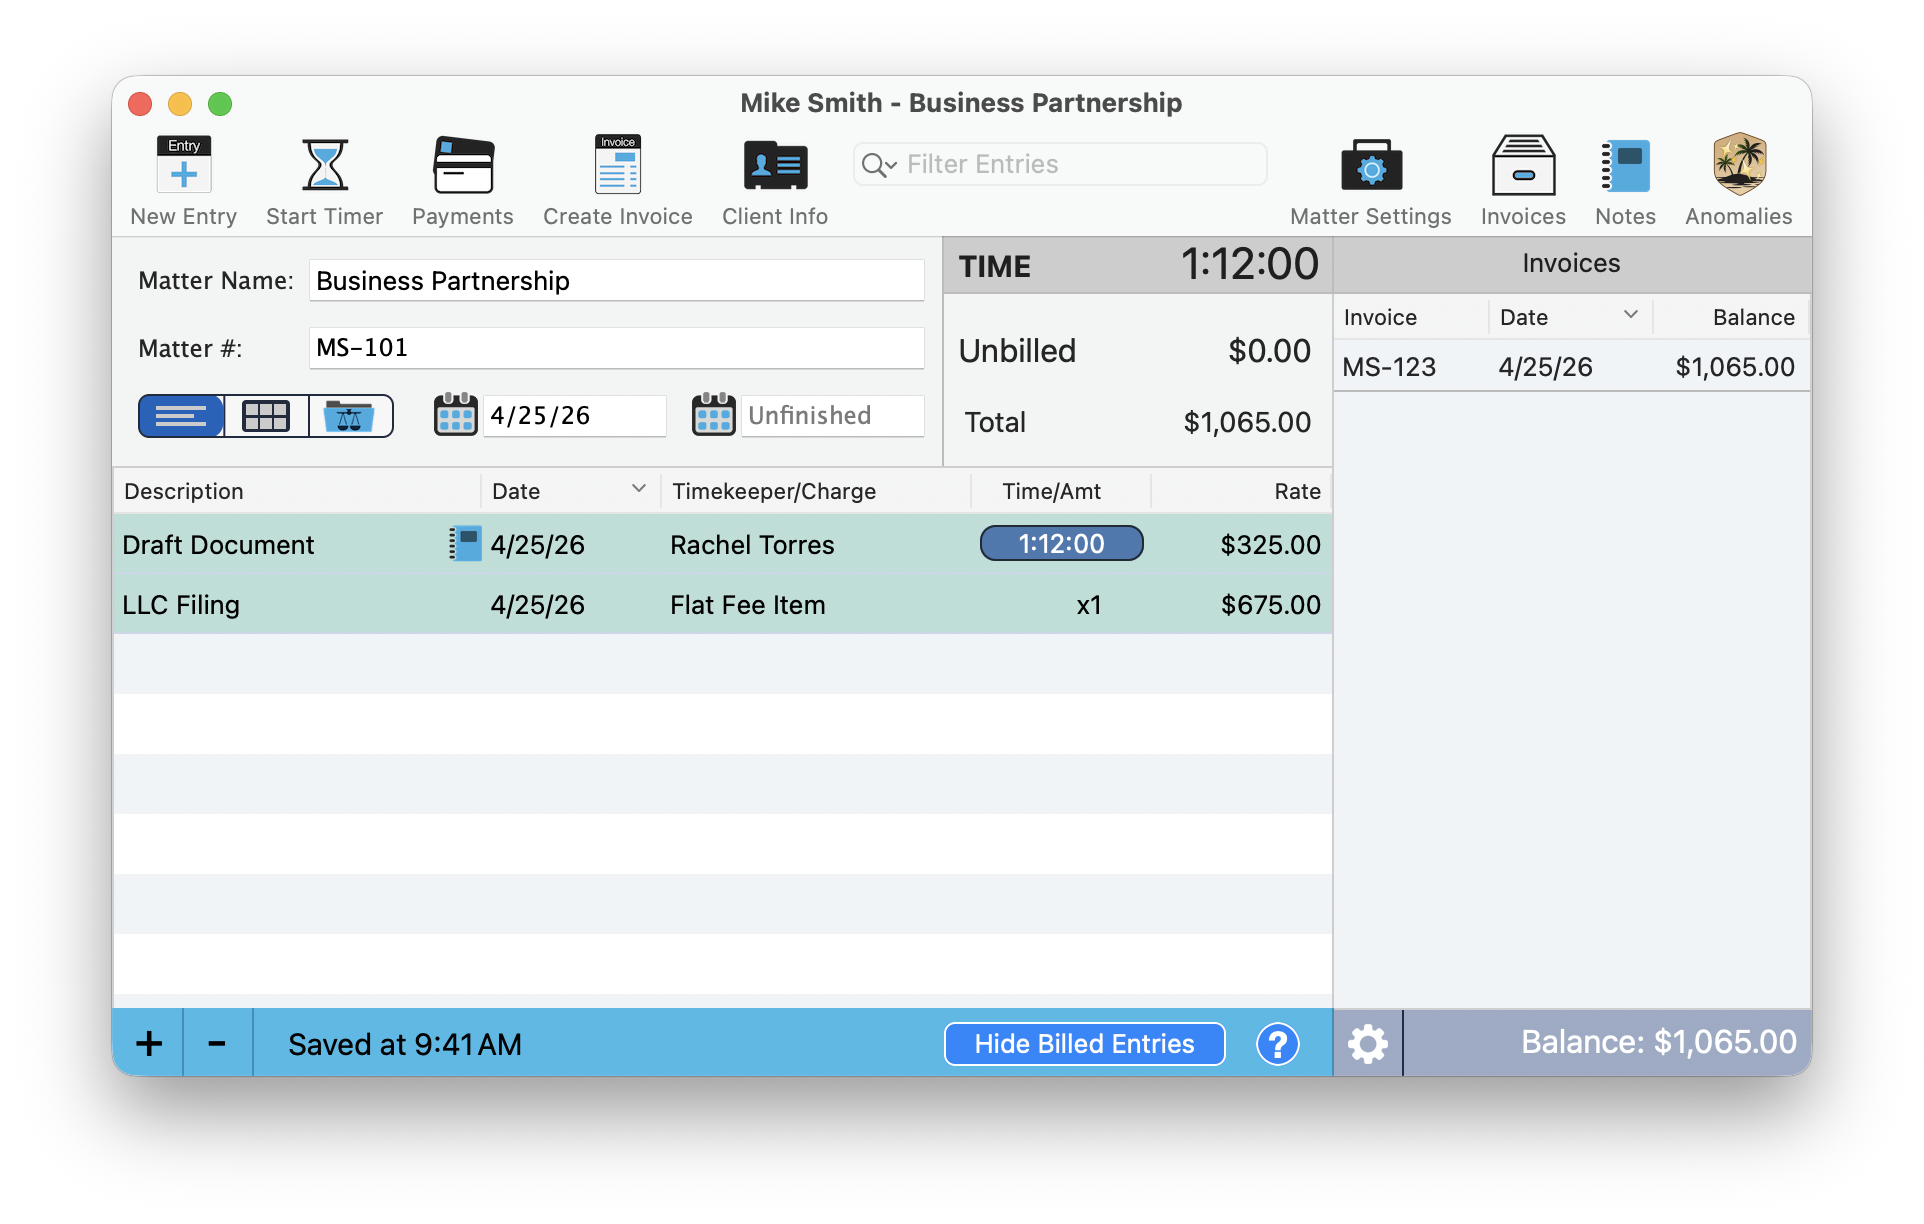
Your matter now shows both entries with the total unbilled amount:
- Draft Document: 1:12:00, $325.00/hr
- LLC Filing: Flat Fee, x1, $675.00
- Total Unbilled: $1,065.00
Both entries in the matter window — time entry and flat fee, totaling $1,065.00 unbilled.
Customize Your Invoice
Before creating your first invoice, let's make it look professional. Go to Preferences (click the gear icon in the toolbar or press ⌘ ,).
Upload Your Logo — Preferences → Firm ID
The Firm ID tab shows your firm information and invoice branding. Drag your logo into the logo area. Click Live Preview to see a sample invoice with your branding applied.
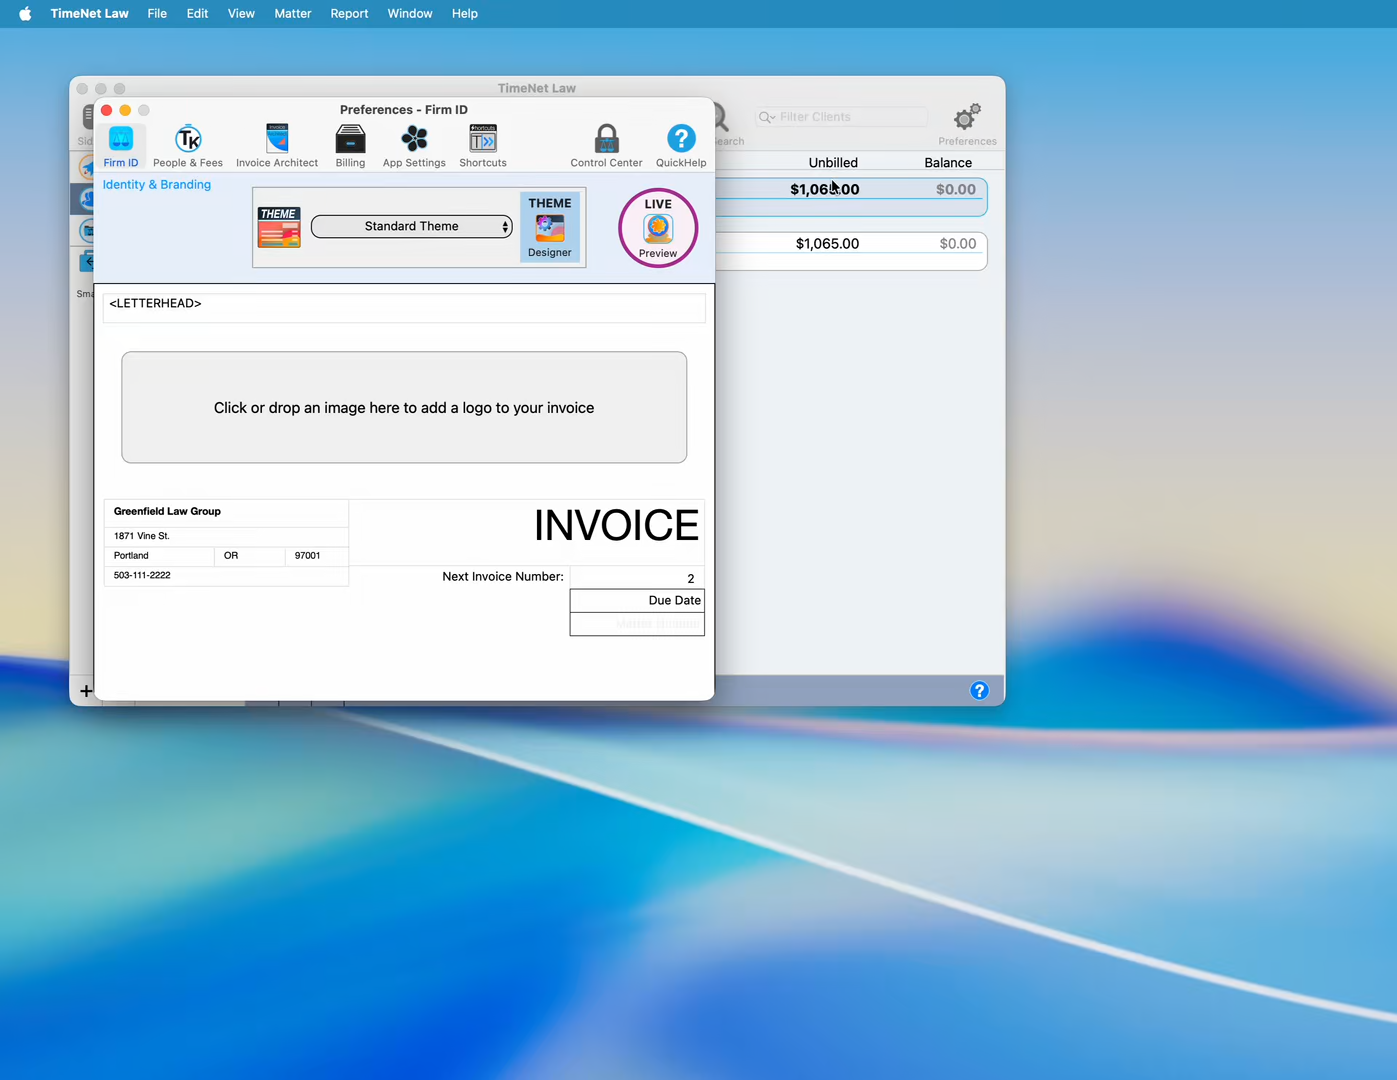
Preferences → Firm ID — drag your logo into the dashed area. Click Live Preview to see it on an invoice.
Choose a Theme — Preferences → Invoice Architect
Click the Invoice Architect tab to see the theme gallery. TimeNet Law includes 10 built-in themes: Standard, Cardinal, Evaporated, Foggy Bay, Grey Navy, Mantis, Midnight Galaxy, Papaya, Picton, Solar Flare, and The Void.
Click any theme to see it applied instantly in the live preview on the right.
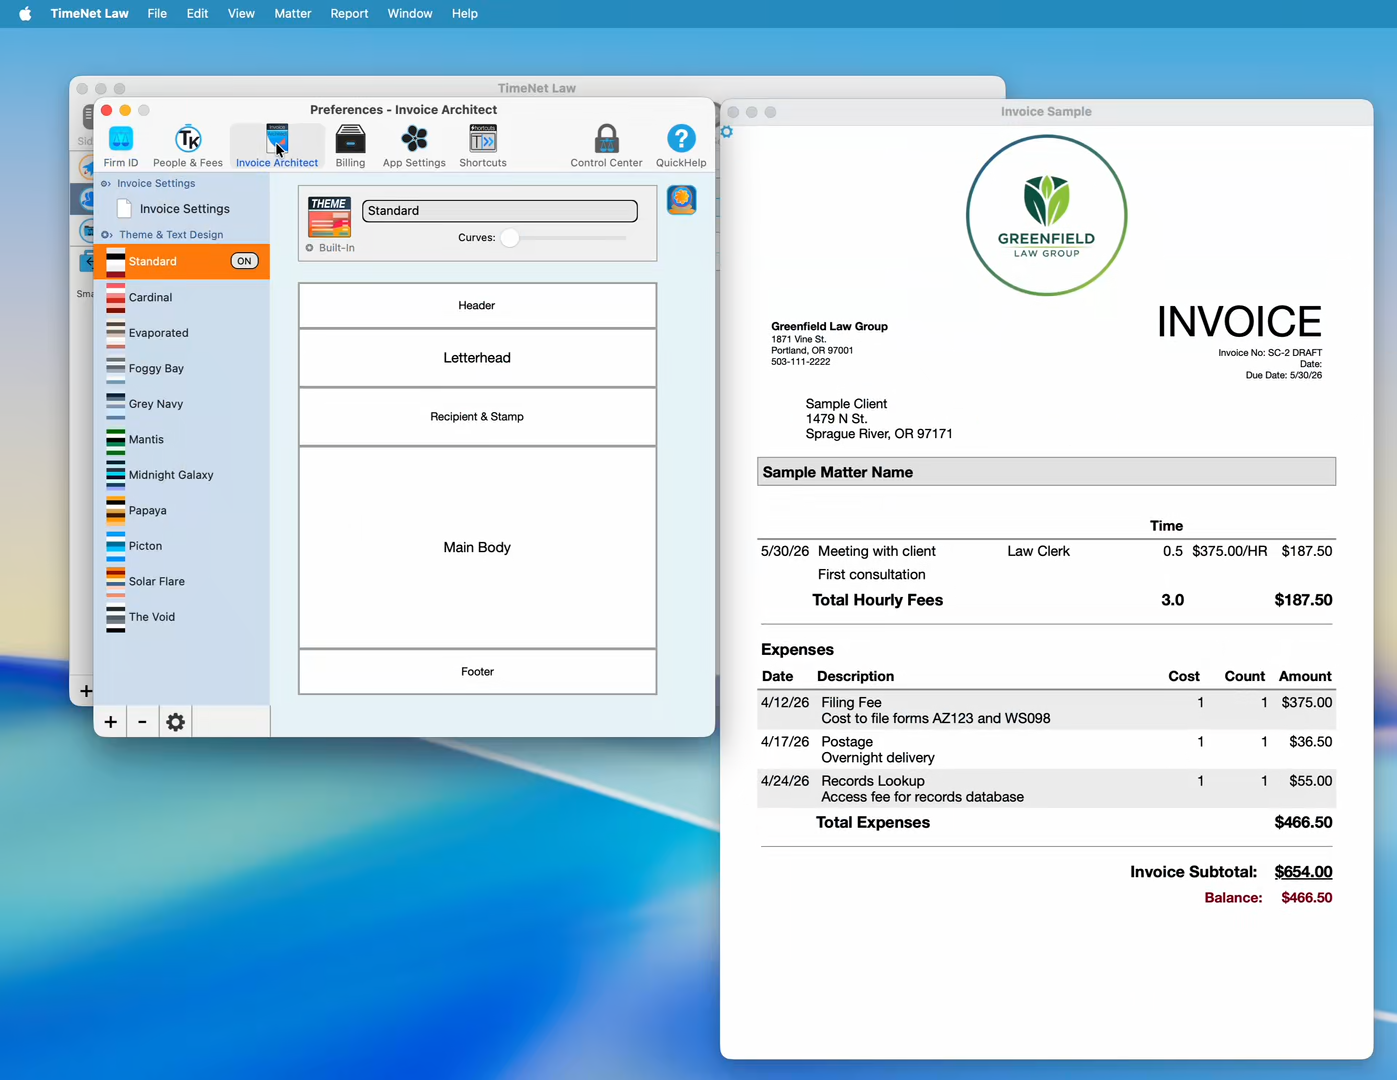
The Invoice Architect — 10 built-in themes. Click any theme to preview it instantly.
Customize Everything — Theme Designer
Click into any theme to open the Theme Designer. You can customize every section of your invoice:
- Header — top branding area
- Letterhead — font, colors, background style (solid, pattern, gradient)
- Recipient & Stamp — client address area
- Main Body — table headers, alternate row colors, column layout
- Footer — payment instructions, contact info
Every change shows instantly in the live preview.
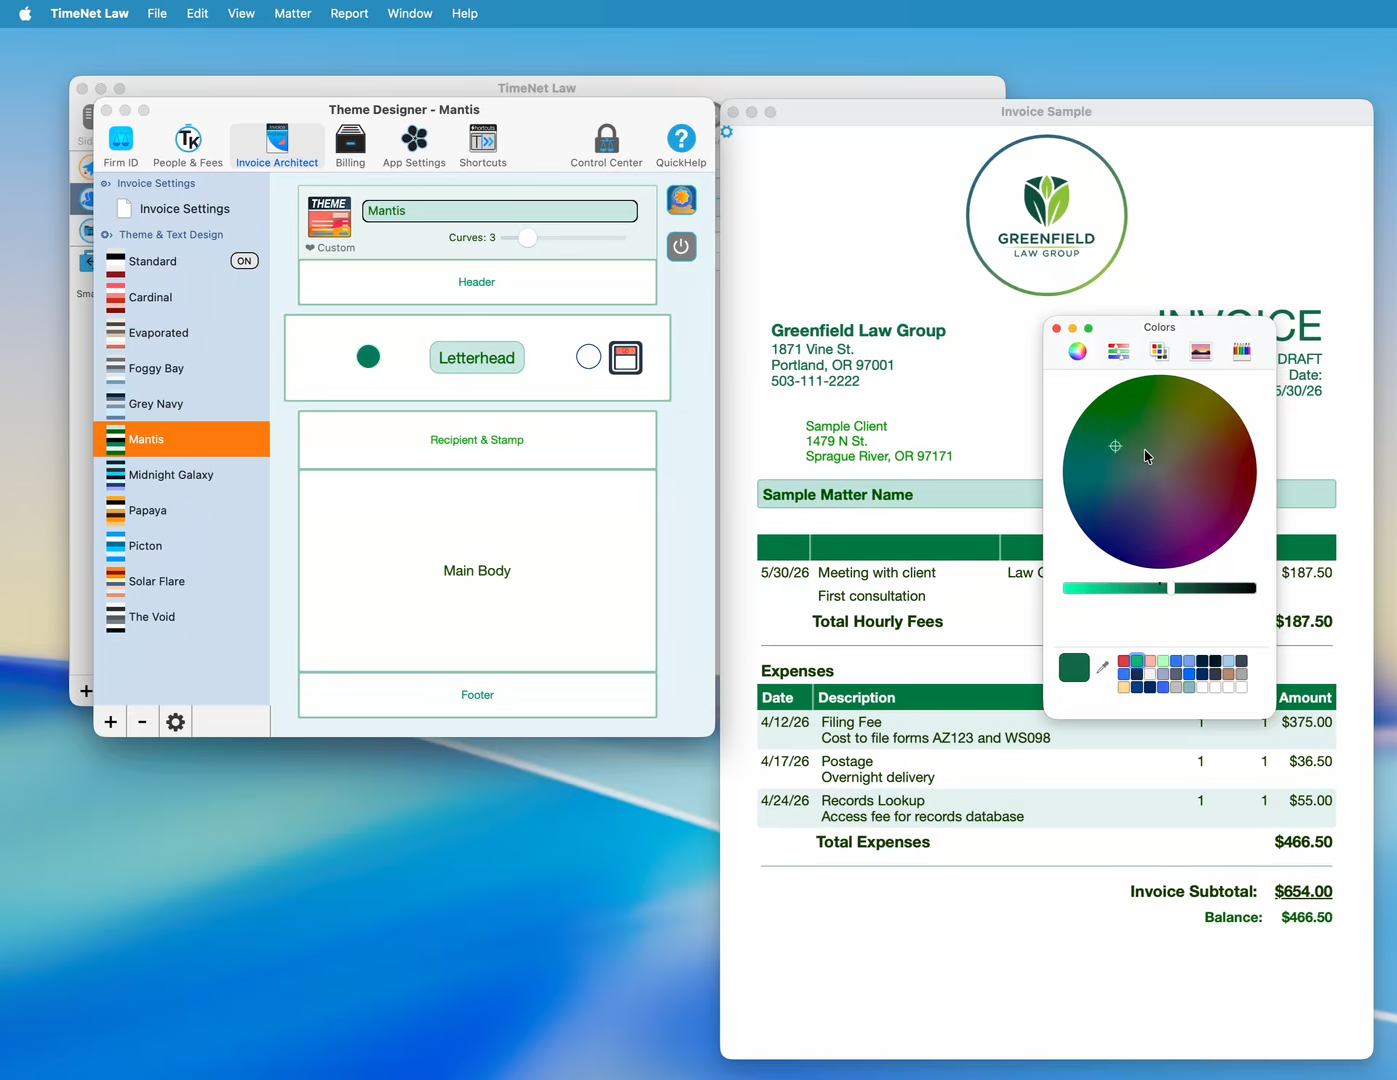
The Theme Designer — customize colors, fonts, backgrounds, and layout for every section of your invoice.
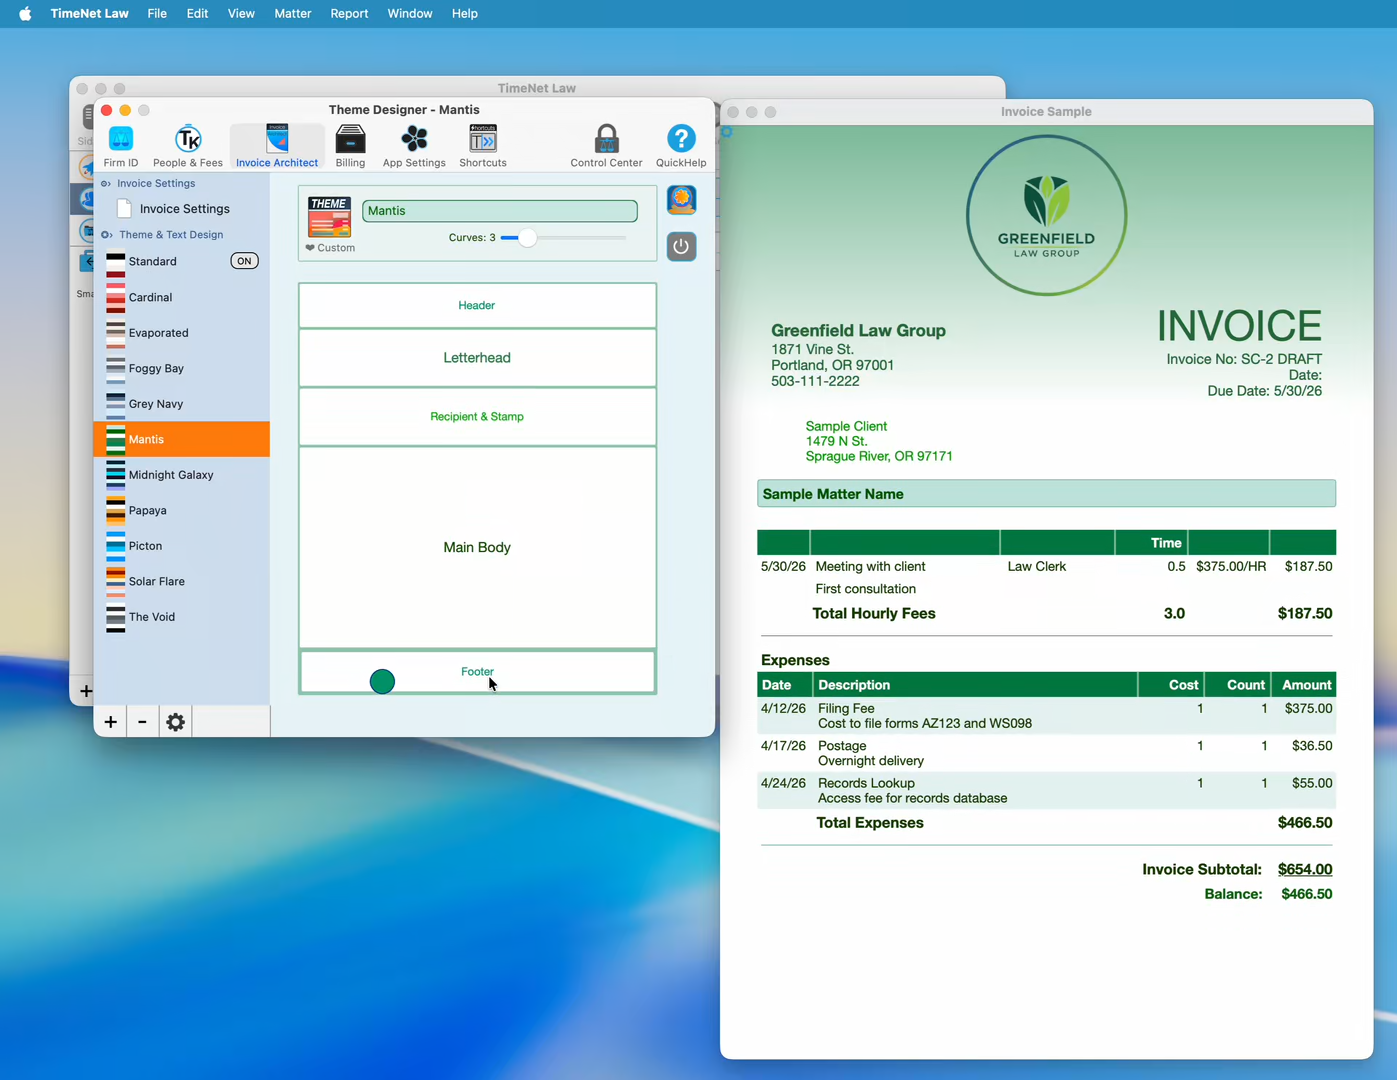
Design your footer — add payment instructions or a message that appears on every invoice.
Click the color swatch on any section to open the macOS color picker. Match your invoice colors to your firm's branding in seconds.
Create Your First Invoice
Go back to your matter window and click Create Invoice in the toolbar.
Step 1: Review the Draft
The Create Invoice window opens with your unbilled entries pre-selected. You'll see:
- Draft / Finalize toggle — start in Draft mode to preview
- Invoice number — auto-generated
- Invoice date and due date
- Live preview on the right showing exactly what your client will see
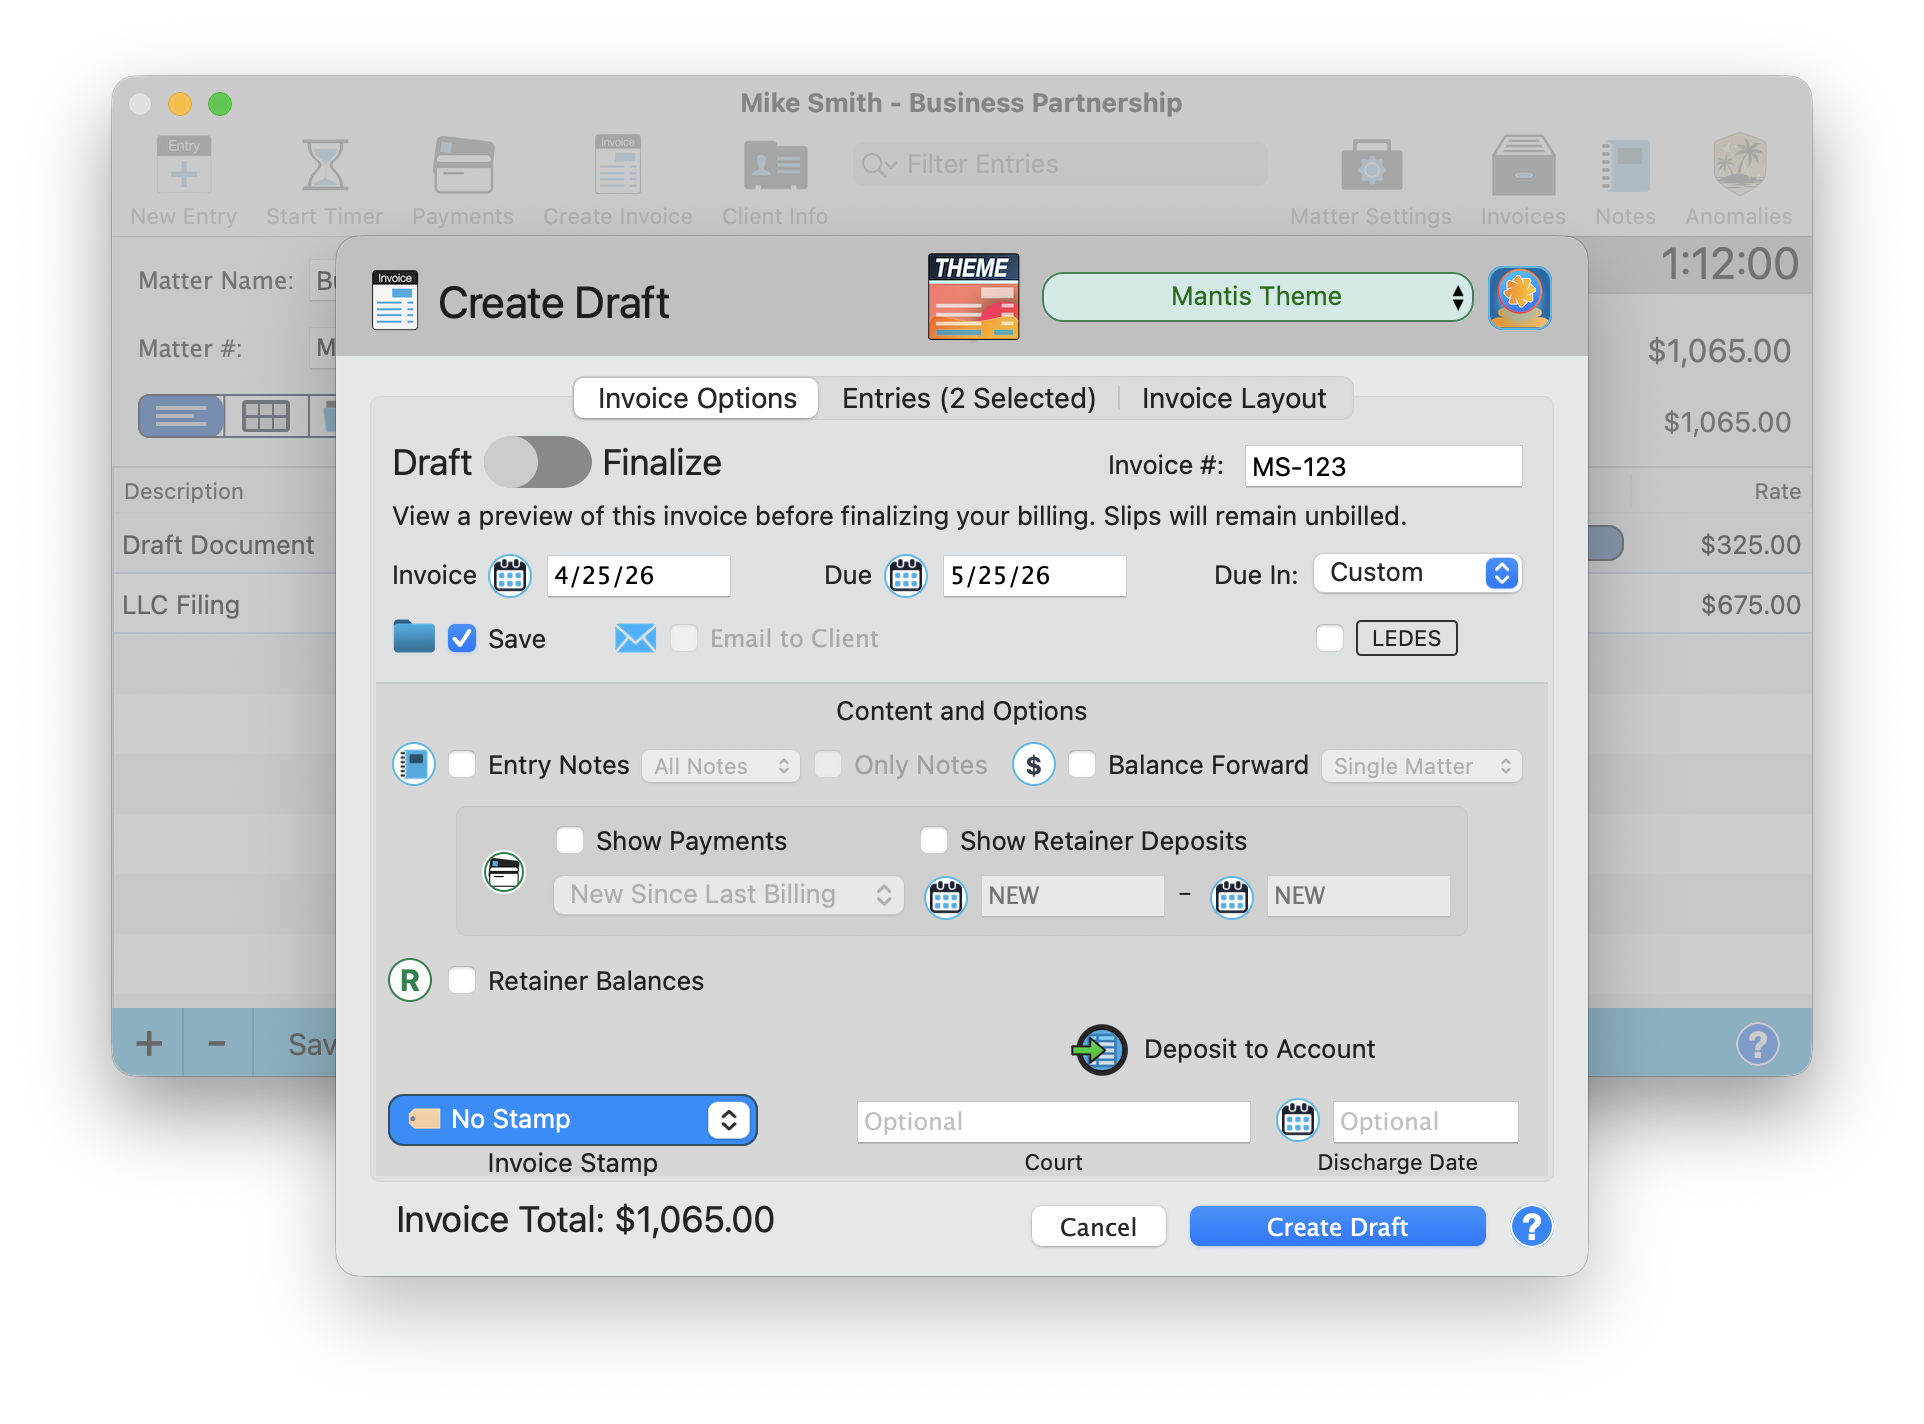
The Create Invoice window — your entries are pre-selected and the live preview shows exactly what your client will receive.
Step 2: Finalize
When you're happy with the preview, toggle Finalize and click Create Invoice. Your entries are marked as billed and the invoice is saved.
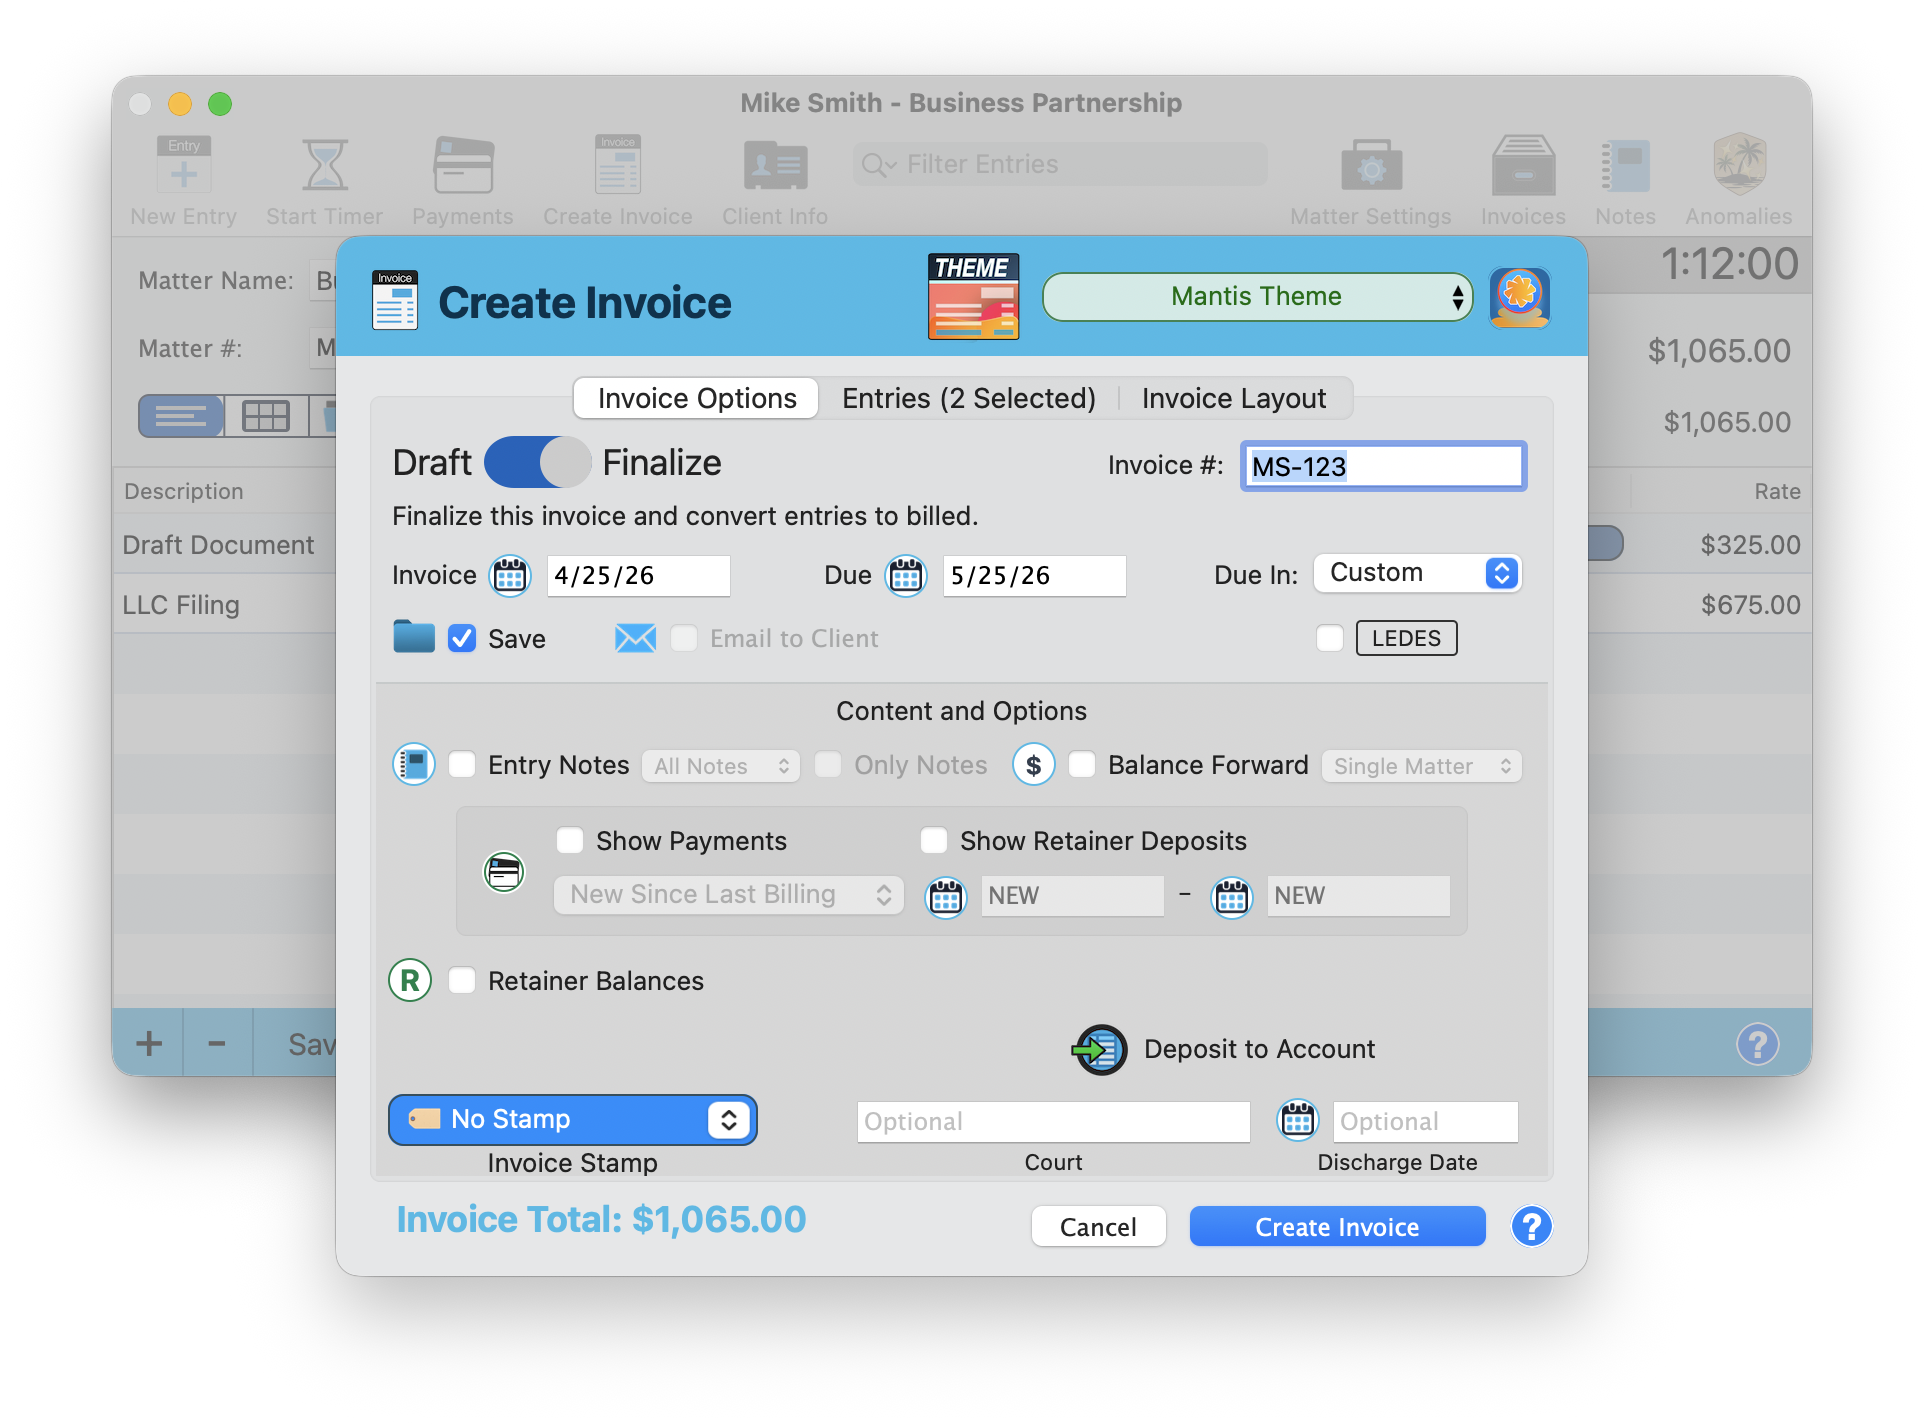
Toggle Finalize to create the final invoice. Entries are marked as billed automatically.
Step 3: View Your Invoice
The finalized invoice opens in Preview — a professional PDF with your logo, theme, and custom footer. Ready to email or print.
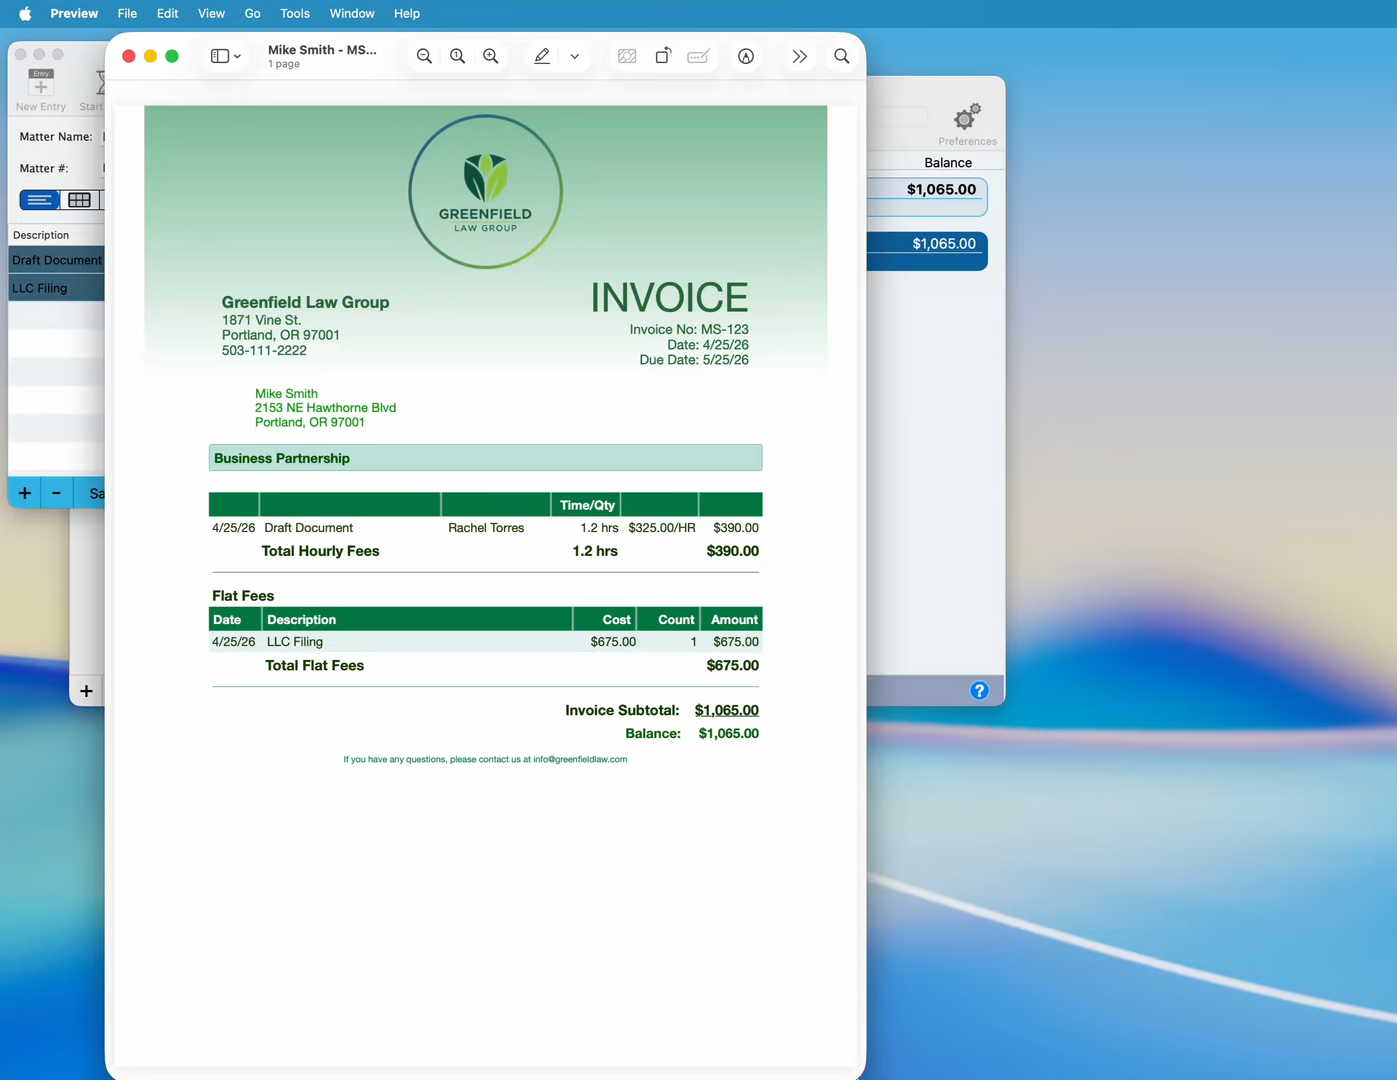
Your finished invoice — professional, branded, and ready to send.
Step 4: View All Invoices
Back in the matter window, click the Invoices tab in the toolbar to see all created invoices for this matter.
The Invoices tab — view, reprint, or email any invoice for this matter.
What's Next?
You've set up your firm, created a client and matter, tracked time, added a flat fee, designed your invoice, and generated a professional PDF — all in about 90 seconds. Here's where to go from here:
- Explore the Launchpad — Your visual command center for calendar views, timers, and daily workflow
- Master the Launchbar — The fastest way to navigate TimeNet Law — search, voice commands, and app-wide shortcuts
- Set Up Email — Send invoices directly from TimeNet Law
- Quick Capture — A minimal floating window for lightning-fast time entry
- Calendar Sync — Connect Apple Calendar for bidirectional sync
- Browse All Tutorials — 50+ guides covering every feature in TimeNet Law
Need a Hand Getting Started? Perry Can Help.
If anything in the setup process isn't clicking, Perry will walk you through it personally.