Every matter starts with a client. The Client Info Window in TimeNet Law is the one place where you manage everything about a client: contact details, billing rates, invoice formatting, trust accounting rules, conflict checks, and more. Think of it as the client's permanent file, always current and always one click away.
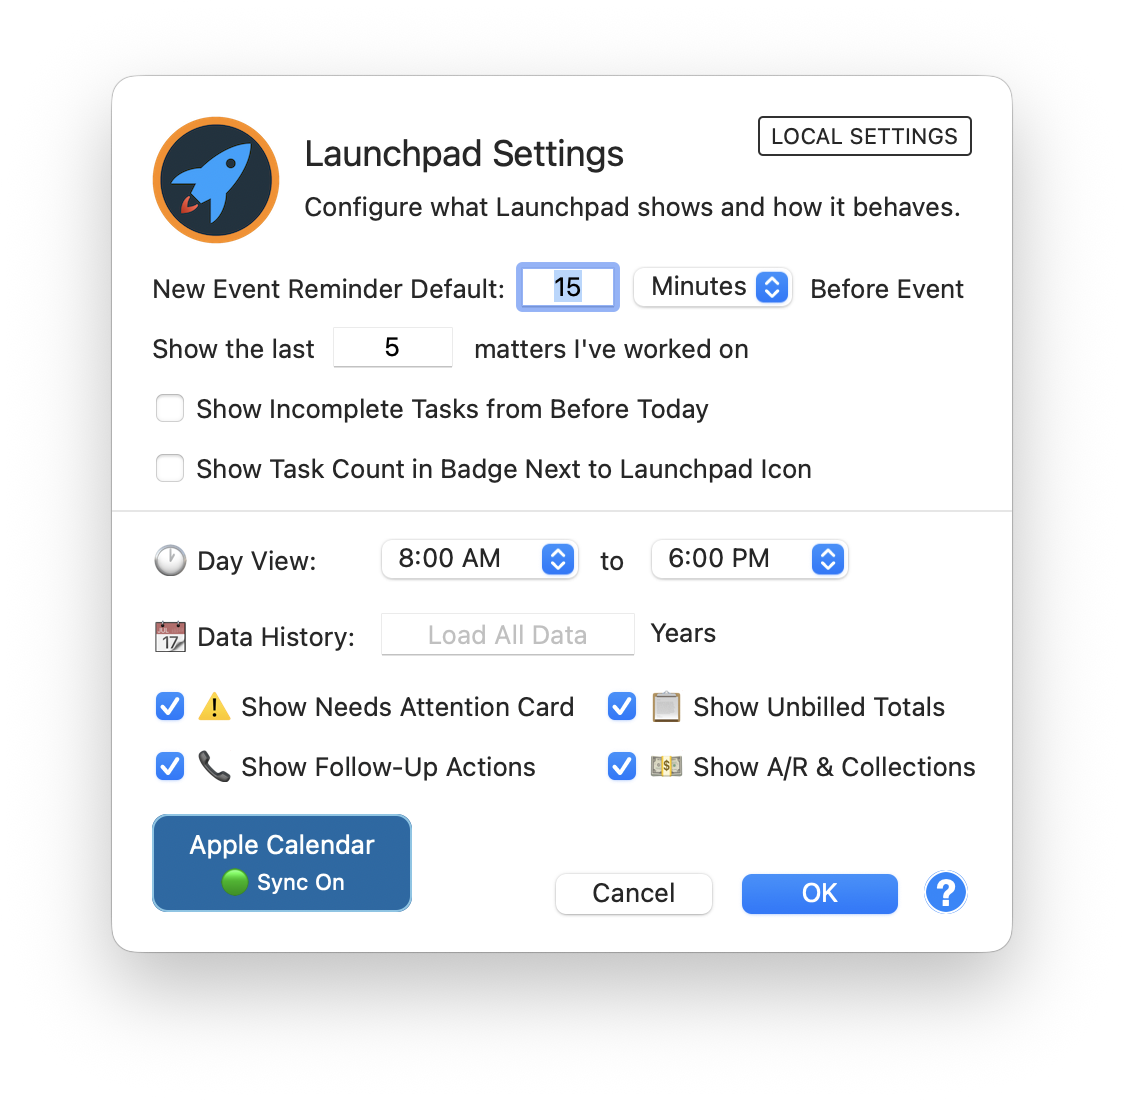
The All Clients view gives you a bird's-eye view of your entire client list. Each row shows the client name, matter count, Unbilled amount, and Balance. Click the disclosure triangle next to any client to expand their individual matters with hours logged and financial details. A sidebar on the left provides quick access to the Launchpad, All Clients list, Documents, Pinned Matters, Recent Matters, and Smart Groups. Use the +/- buttons at the bottom toolbar to add or remove clients and matters.
Creating a New Client
You can add a new client in a few ways:
- Menu bar: File, then New Client
- Keyboard shortcut: ⌘ + N and select "Client"
- Sidebar: Click the + button at the bottom of the client list
Any of these opens the Client Info Window with blank fields, ready for you to fill in. When you're done, hit Save Changes at the bottom of the window.
The Client Info Window Layout
The Client Info Window has two main areas: a header section at the top and a tabbed section below it.
Header Area
Across the top you'll find the core identity fields for the client:
- Name - The full client name, used throughout the app and on invoices
- Code - A short code (like "EES") for quick reference
- ID - The client's unique identifier
- Status - A dropdown with a green dot for Active (also supports Closed and other statuses)
- Category - A dropdown to classify your client
- Last Matter # - Auto-increments as you create new matters for this client
Contact Section
Below the header is a light blue contact area with everything you need for communication:
- ATTN - The primary contact or attention line
- Address fields - Street, Building/Suite, City, State, Zip, and Country
- Date Met - Optional calendar field to track when the relationship started
- Birthdate - Optional calendar field for personal clients
- Contact Info table - Rows with Contact Type (Phone, Email) and Contact Info columns. Each row has quick-action icons: a message bubble for phone entries and an envelope for email entries.
Use the + and - buttons to add or remove contact entries. You can store as many phone numbers and email addresses as you need.
The Date Met and Birthdate fields are great for relationship tracking. Use Date Met to remember when a client first came on board, and Birthdate for personal touches with individual clients.
The bottom half of the window is divided into six tabs: Billing, Invoices, Parties & Conflicts, Groups, Automatic Bookkeeper, and Notes. Let's walk through each one.
Billing Tab
The Billing tab is where you dial in how this client gets billed. It's packed with options, so let's break it down.
Custom Rate and Currency
- Custom Rate /hr - Set a client-specific hourly rate (with a $ icon). This overrides your firm's default rate for all work on this client.
- LEDES - A button for exporting in LEDES format, the legal industry standard for electronic billing. If your client requires LEDES invoices, this is where you set it up.
- Currency - A dropdown defaulting to $, with support for multiple currencies for international clients.
- Use Task Codes - A checkbox to enable task-based billing codes on time entries for this client.
Timekeeper Rates
Click the blue Timekeeper Rates button to open a popover showing "Default timekeeper billing rates and revenue allocation." This is where you assign rate tiers to each timekeeper.
The table lists each timekeeper with their assigned rate tier and amount. For example, one attorney might be set to "Standard ($375.00)" while a paralegal uses "Research ($95.00)" and another attorney has "Reduced ($175.00)." Each row also has an Allocation % column for revenue allocation if your firm uses that feature.
When custom rates are configured, the button shows a green "Customized" indicator so you can tell at a glance that this client has non-default rates.
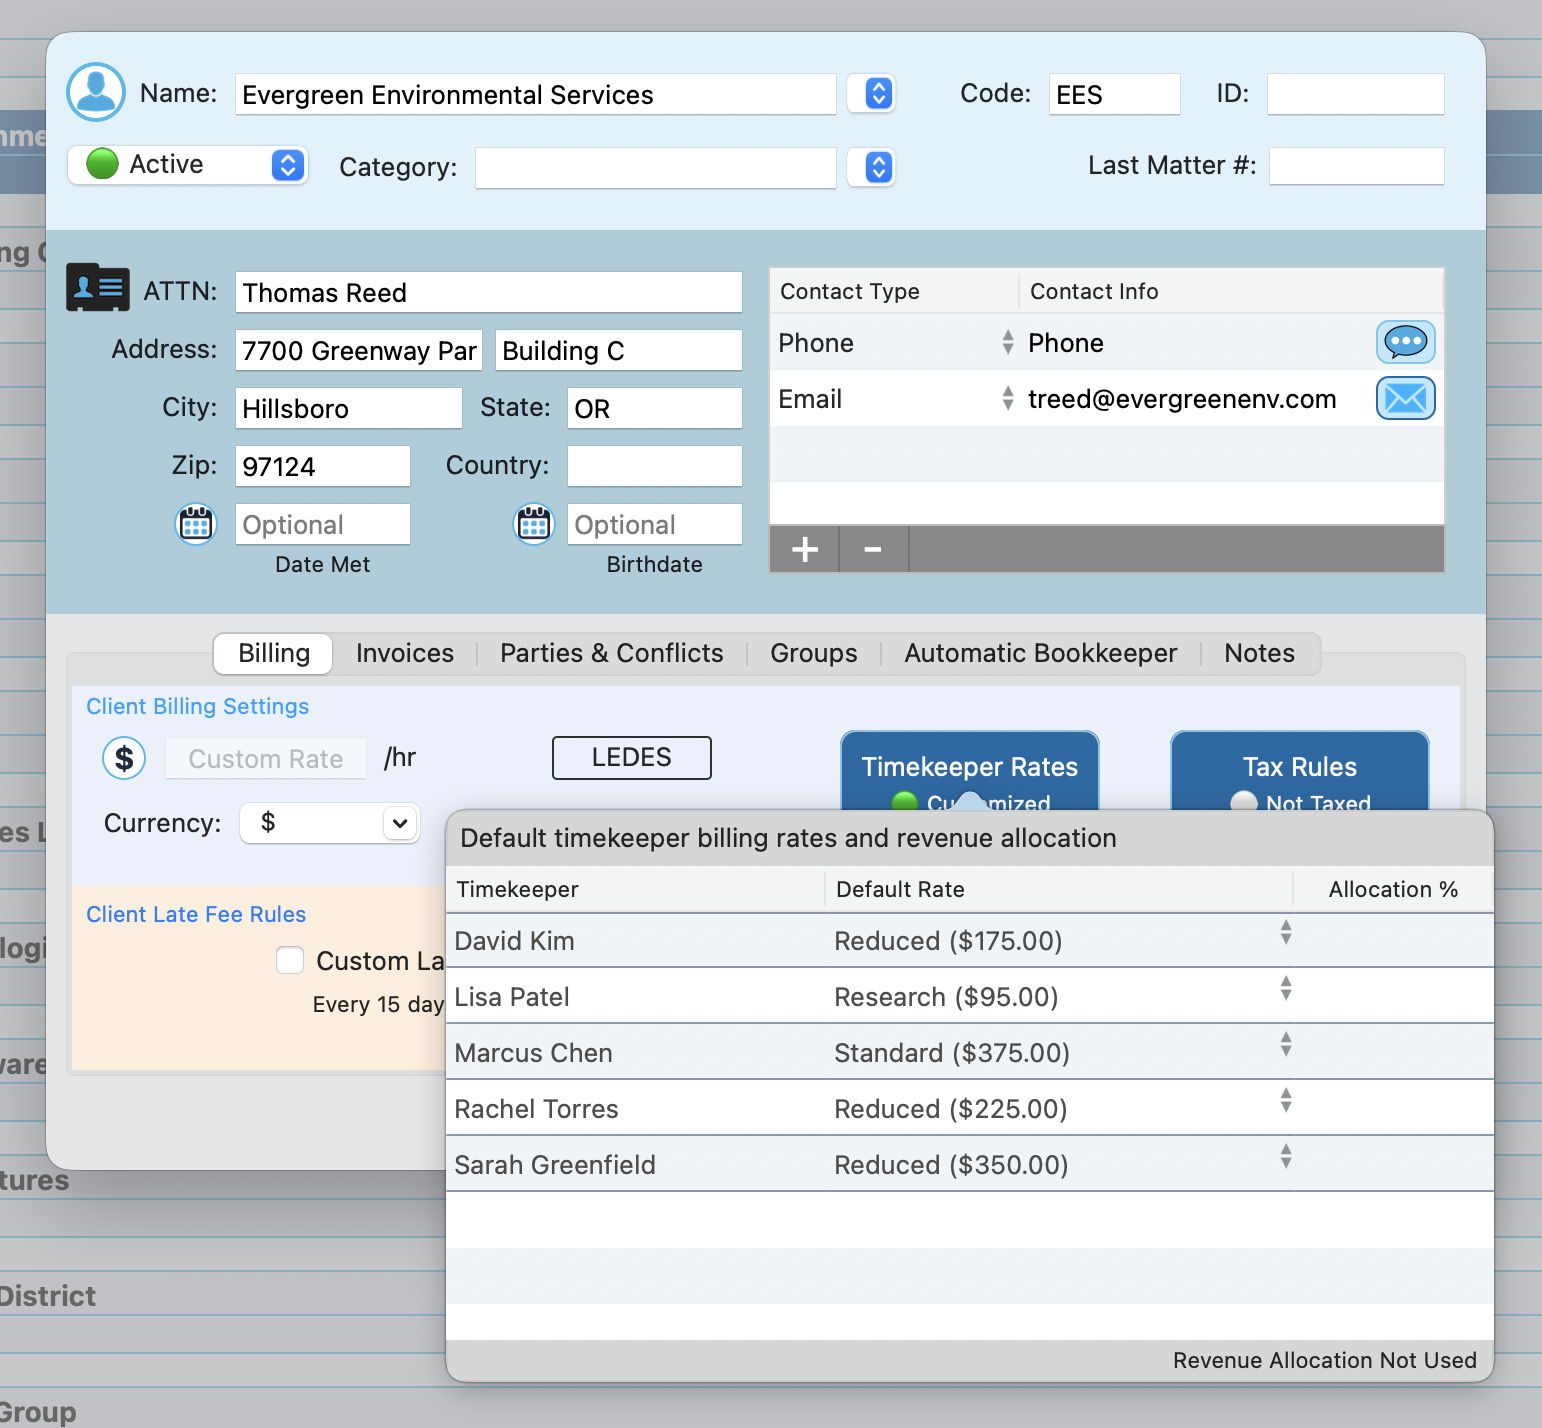
Rate tiers (Standard, Reduced, Research, etc.) let you manage rates across your firm without updating every client individually. Change the tier amount once and it updates everywhere that tier is used.
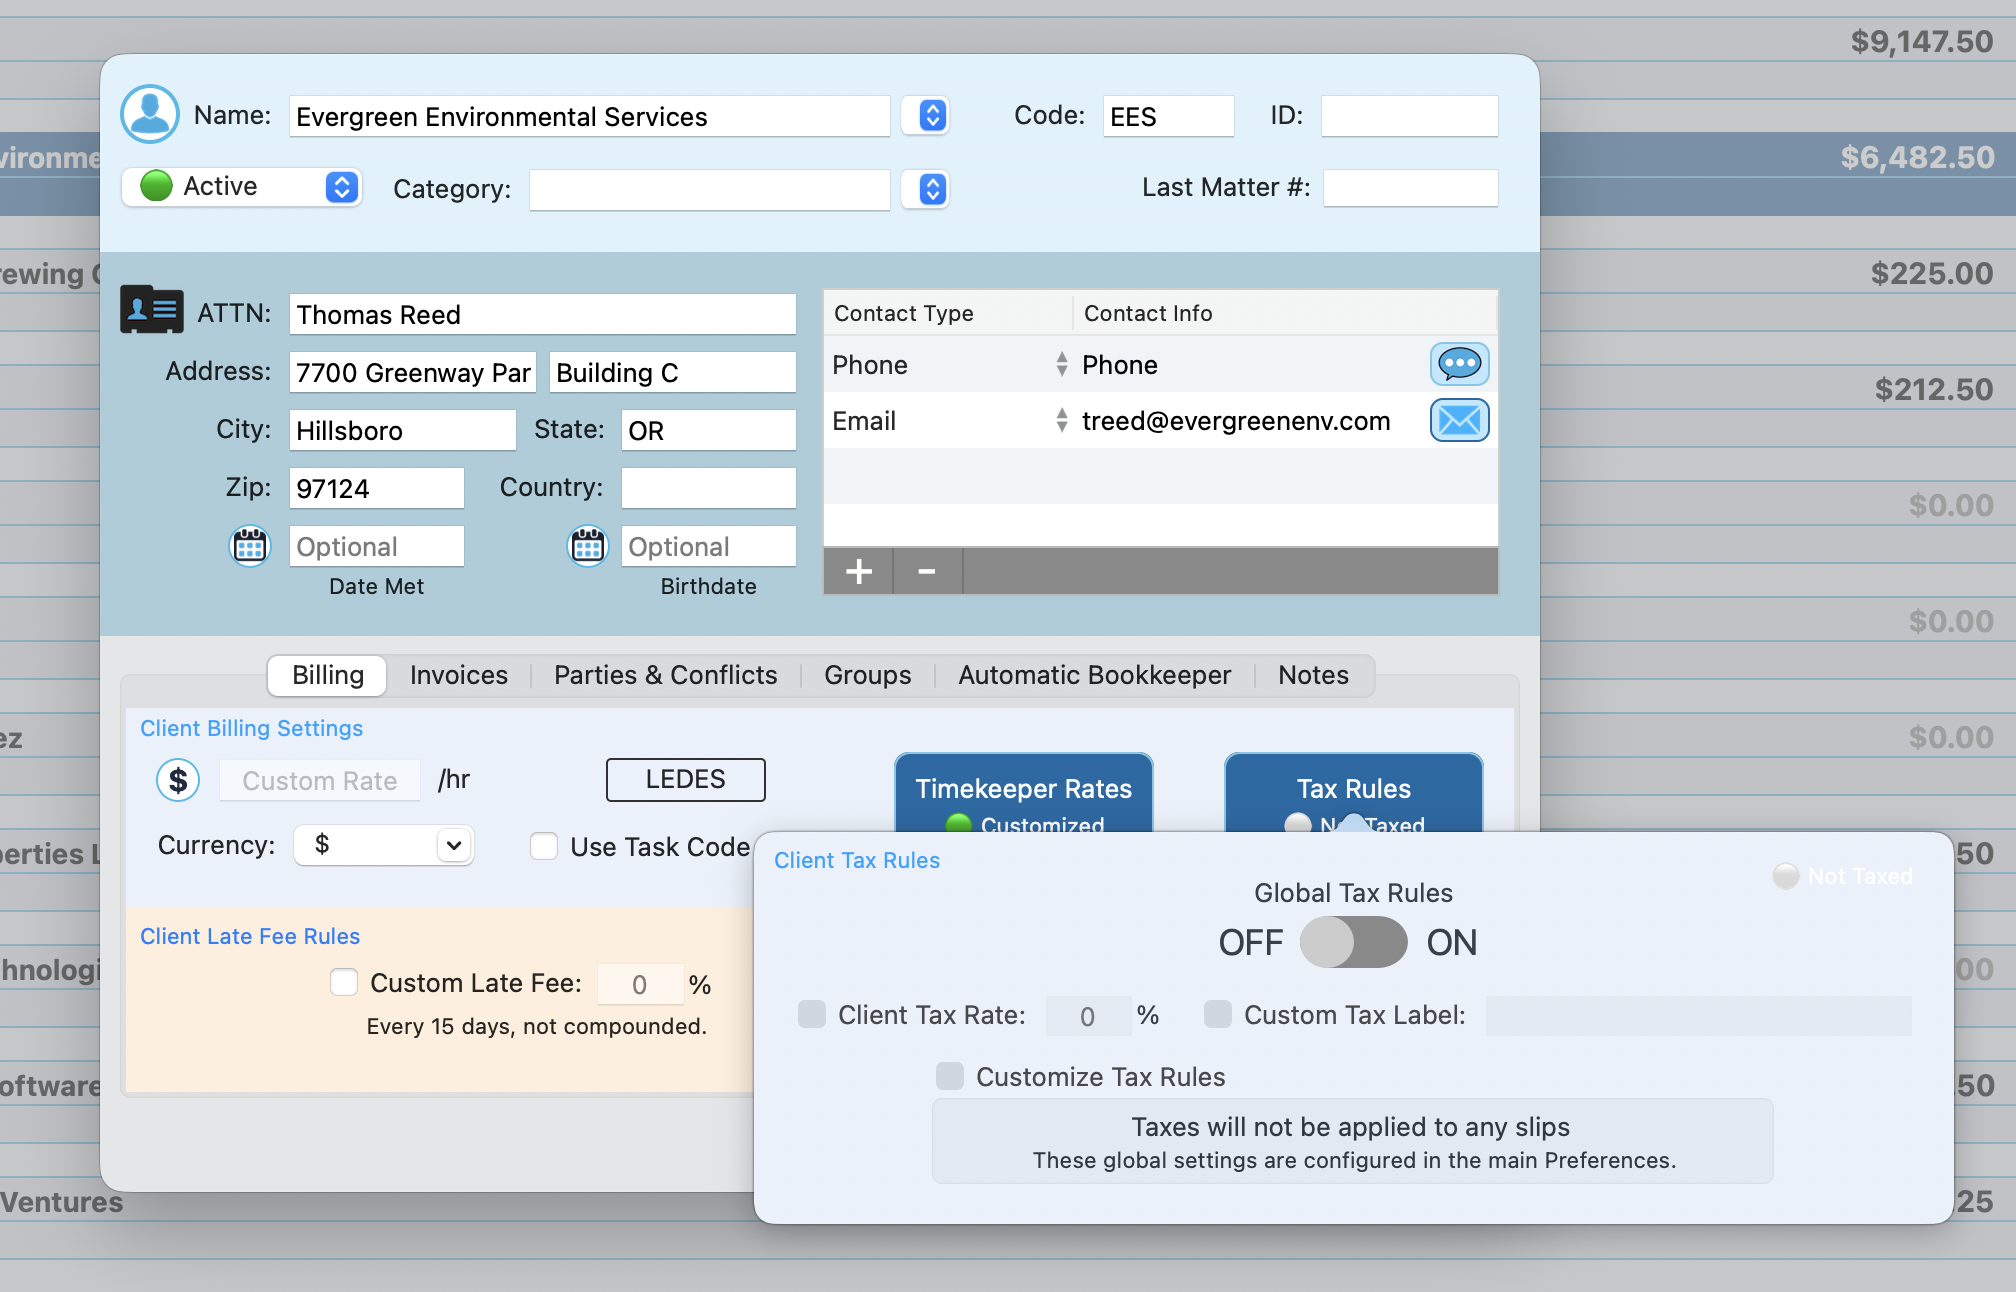
Tax Rules
Click the blue Tax Rules button to open the tax configuration for this client. The popover shows:
- Global Tax Rules ON/OFF toggle - Turn taxes on or off for this client
- Client Tax Rate % - Set a custom tax percentage
- Custom Tax Label - Rename the tax line on invoices (e.g., "GST" or "VAT")
- Customize Tax Rules checkbox - Override the global settings for this specific client
When taxes are not applied, the button shows a "Not Taxed" indicator. The popover also explains: "Taxes will not be applied to any time entries. These global settings are configured in the main Preferences."
Late Fee Rules
At the bottom of the Billing tab is the Client Late Fee Rules section, set against a peach background so it's easy to spot. Here you can:
- Enable a Custom Late Fee with a checkbox
- Set the late fee percentage
- Configure the frequency and compounding (for example, "Every 15 days, not compounded")
Invoices Tab
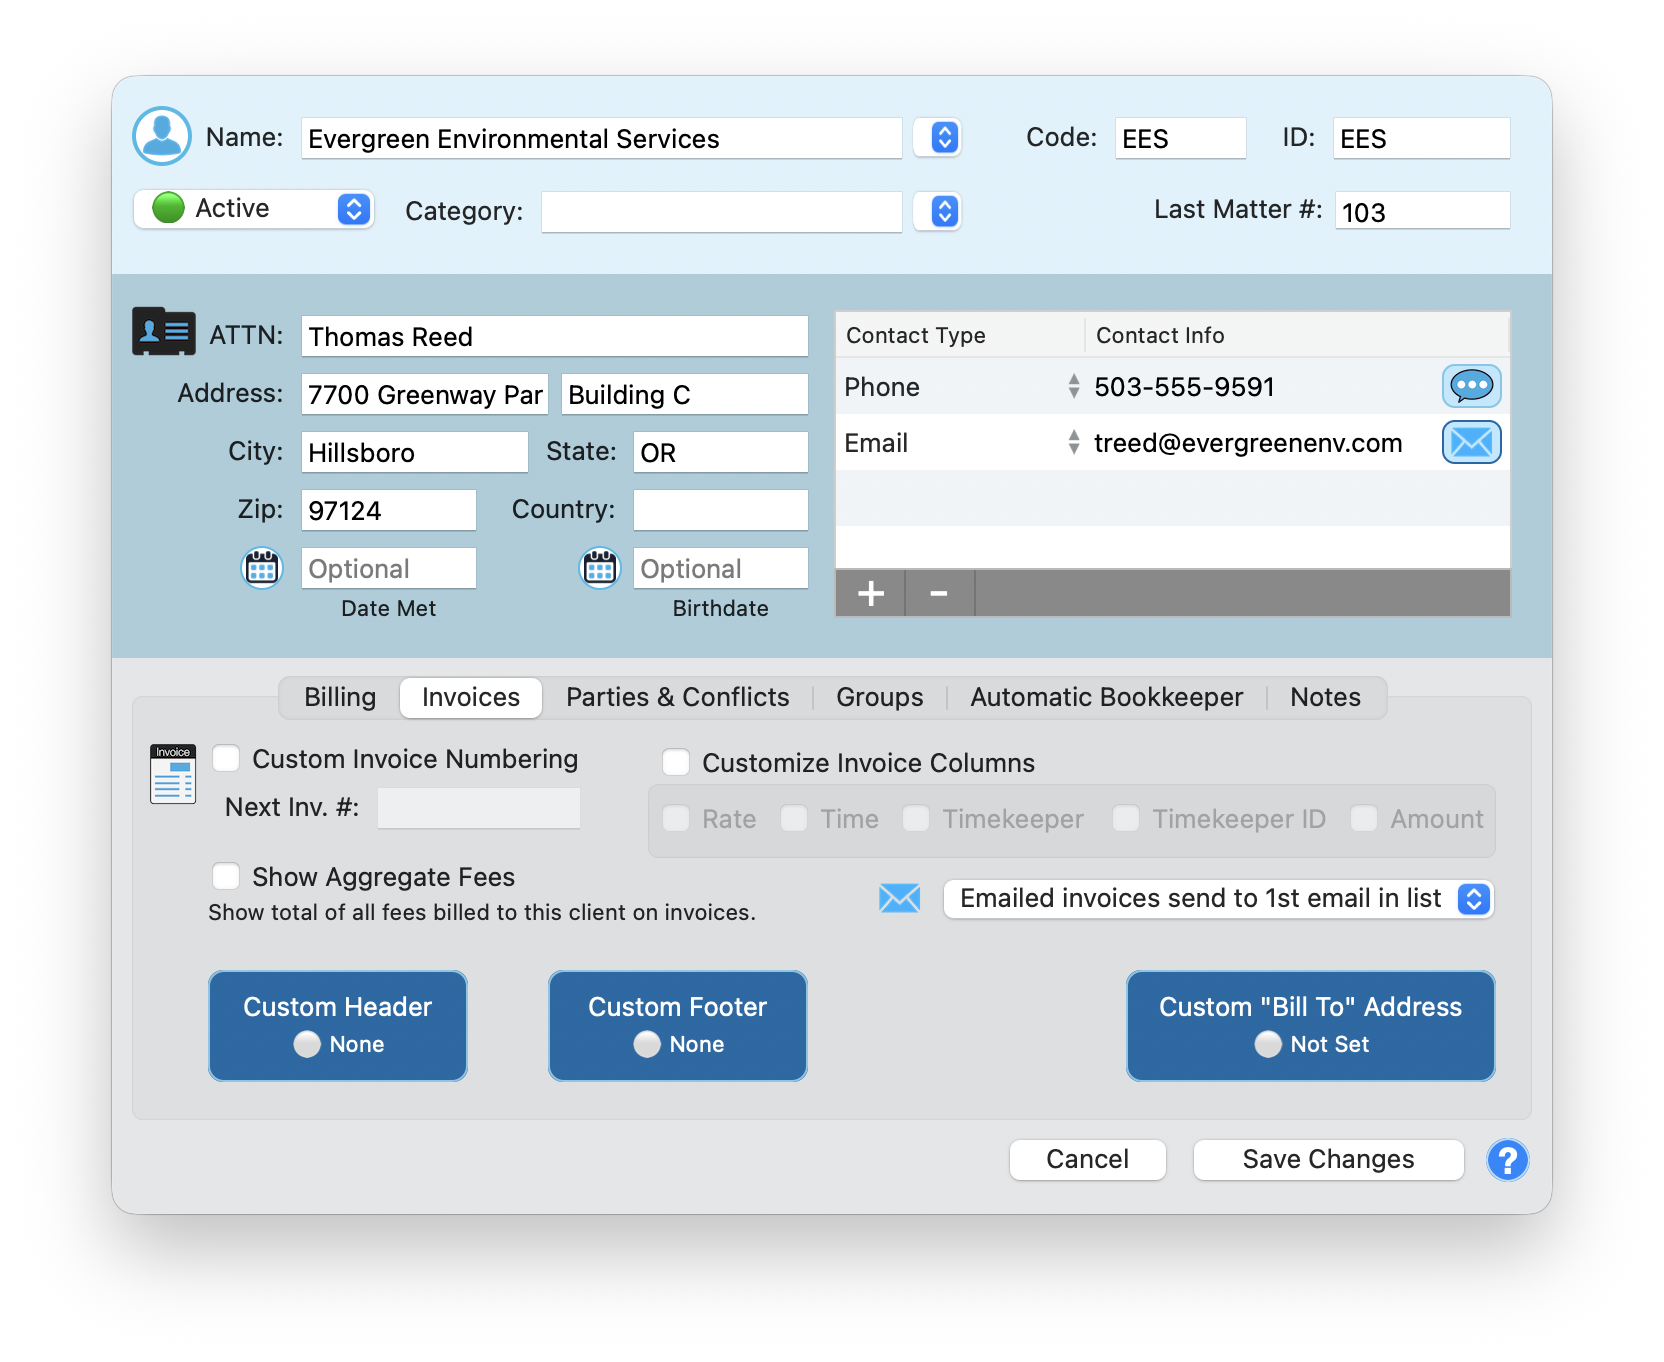
The Invoices tab controls how invoices look and where they go for this client.
Invoice Numbering
Check Custom Invoice Numbering to give this client their own invoice number sequence, then set the Next Inv. # field to your starting number.
Column Customization
Check Customize Invoice Columns to pick exactly which columns appear on this client's invoices. You can toggle:
- Rate
- Time
- Timekeeper
- Timekeeper ID
- Amount
Aggregate Fees
The Show Aggregate Fees checkbox adds a total of all fees billed to this client on each invoice. Handy for clients who want a running summary.
Email Routing
An email icon and "Emailed invoices send to" dropdown let you pick which contact address receives invoices. The default is "1st email in list," but you can choose any email from the client's contact info.
Custom Header, Footer, and Bill-To Address
Three blue buttons at the bottom give you full control over invoice branding for this client:
- Custom Header - Add a client-specific header to invoices (shows "None" when not set)
- Custom Footer - Add a client-specific footer (shows "None" when not set)
- Custom "Bill To" Address - Override the default contact address with a separate billing address (shows "Not Set" when not configured)
Remember to click Save Changes after updating any invoice settings. Changes are not saved automatically.
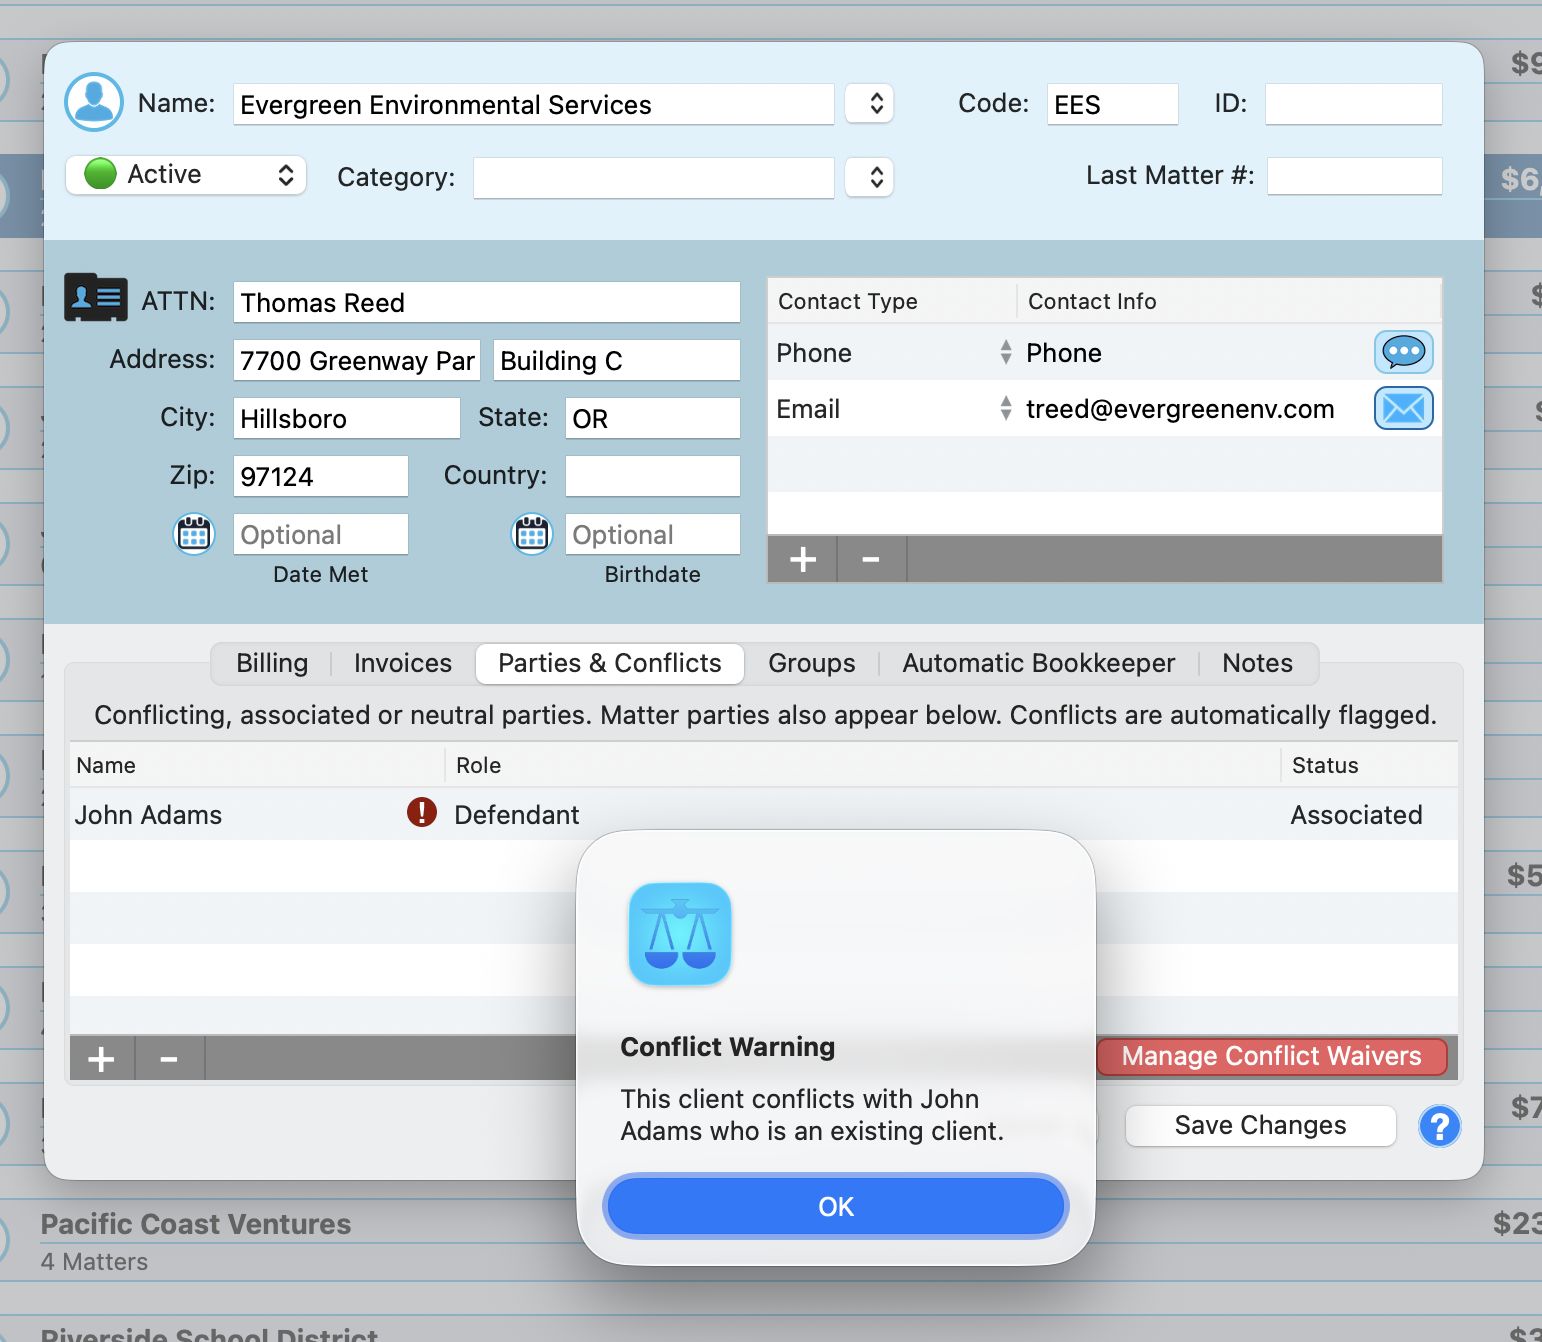
Parties & Conflicts Tab
This tab tracks conflicting, associated, or neutral parties. Matter parties also appear here. Conflicts are automatically flagged.
The table lists each party with three columns: Name, Role, and Status. Status values include Associated, Conflicting, and Neutral. When a party's name matches an existing client or appears across multiple matters, TimeNet Law flags it automatically with a red exclamation mark icon.
If a conflict is detected, a Conflict Warning dialog appears with the specific details, such as "This client conflicts with John Adams who is an existing client." The red Manage Conflict Waivers button lets you acknowledge and document that a waiver exists for a specific conflict.
Use the + and - buttons to add new parties or remove existing ones. Each party has a full profile including name, role, status, address fields, and a contact info table.
For a full walkthrough, see:
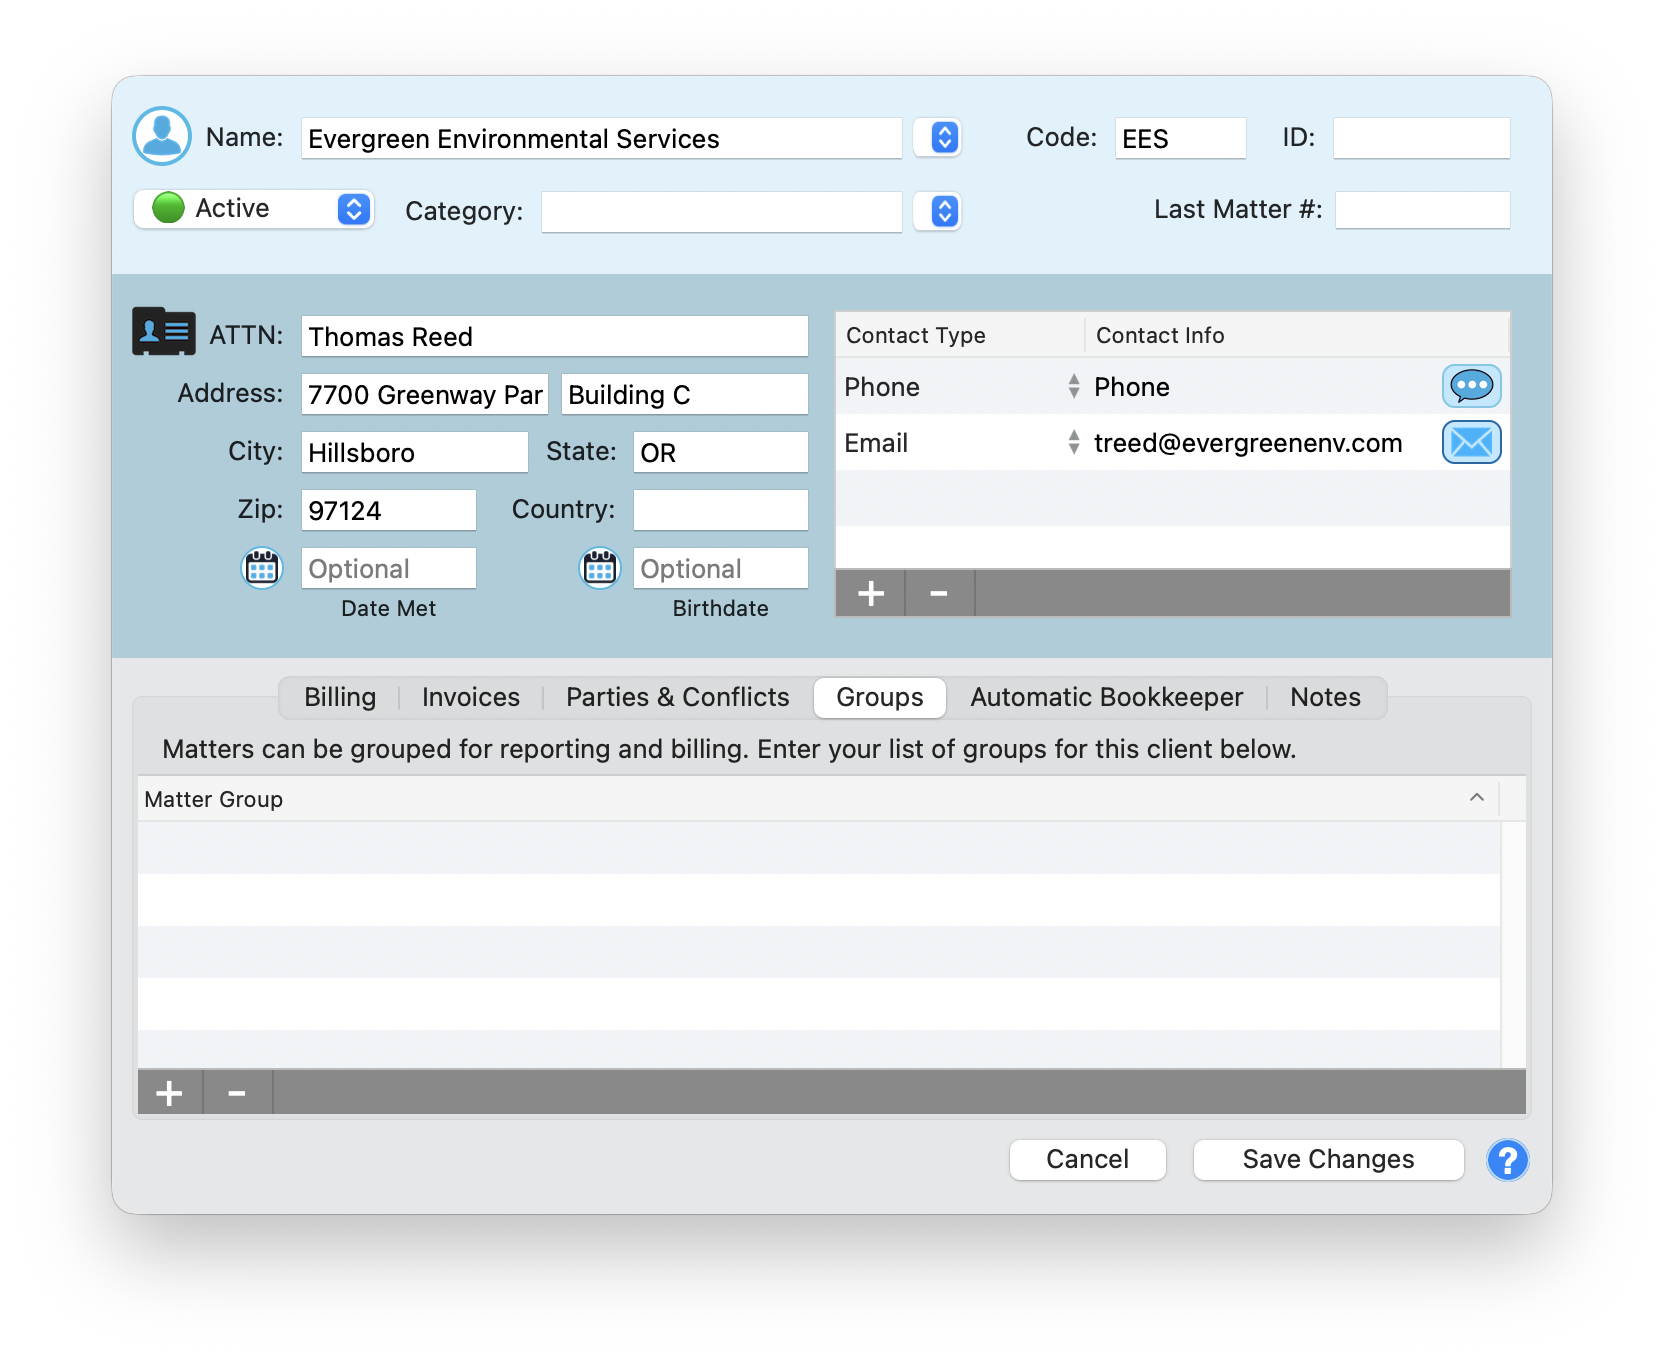
Groups Tab
Matters can be grouped for reporting and billing. The Groups tab shows a simple table with a single Matter Group column where you list your group names for this client.
Use the + and - buttons to assign or remove groups. Groups assigned here appear in reporting filters and billing summaries, making it easy to pull data for a specific category of work.
For details on creating and managing groups, see Groups and Smart Groups.
Automatic Bookkeeper Tab
This is where TimeNet Law's trust accounting automation really shines. The Automatic Bookkeeper handles payments from trust and escrow accounts so you don't have to do it manually.
Custom Rules
At the top is a Use Custom Rules ON/OFF toggle. Turning this on lets you override the global Automatic Bookkeeper rules (set in Preferences) with client-specific settings. There's also a "Flag When Unbilled Exceeds Retainer" checkbox to get alerts when work outpaces the retainer balance.
Pay From
The Pay From section (highlighted in green) controls where payments come from:
- Trust Fund Account - A dropdown to select the trust account for this client
- Matter Account - A checkbox to pay from the matter-level account instead
The description reads: "Apply from Trust Fund Account."
Backup Account
Below that is the Escrow Account dropdown for a backup funding source. The description explains: "If the Trust Account runs out, use the Escrow Account." This stays grayed out when not enabled.
Minimum Balances
The Evergreen fields let you set required minimum balances so you always know when accounts need replenishing:
- Evergreen Trust - Required minimum balance for the trust account (e.g., $5,500.00)
- Evergreen Escrow - Required minimum balance for the escrow account (e.g., $0.00)
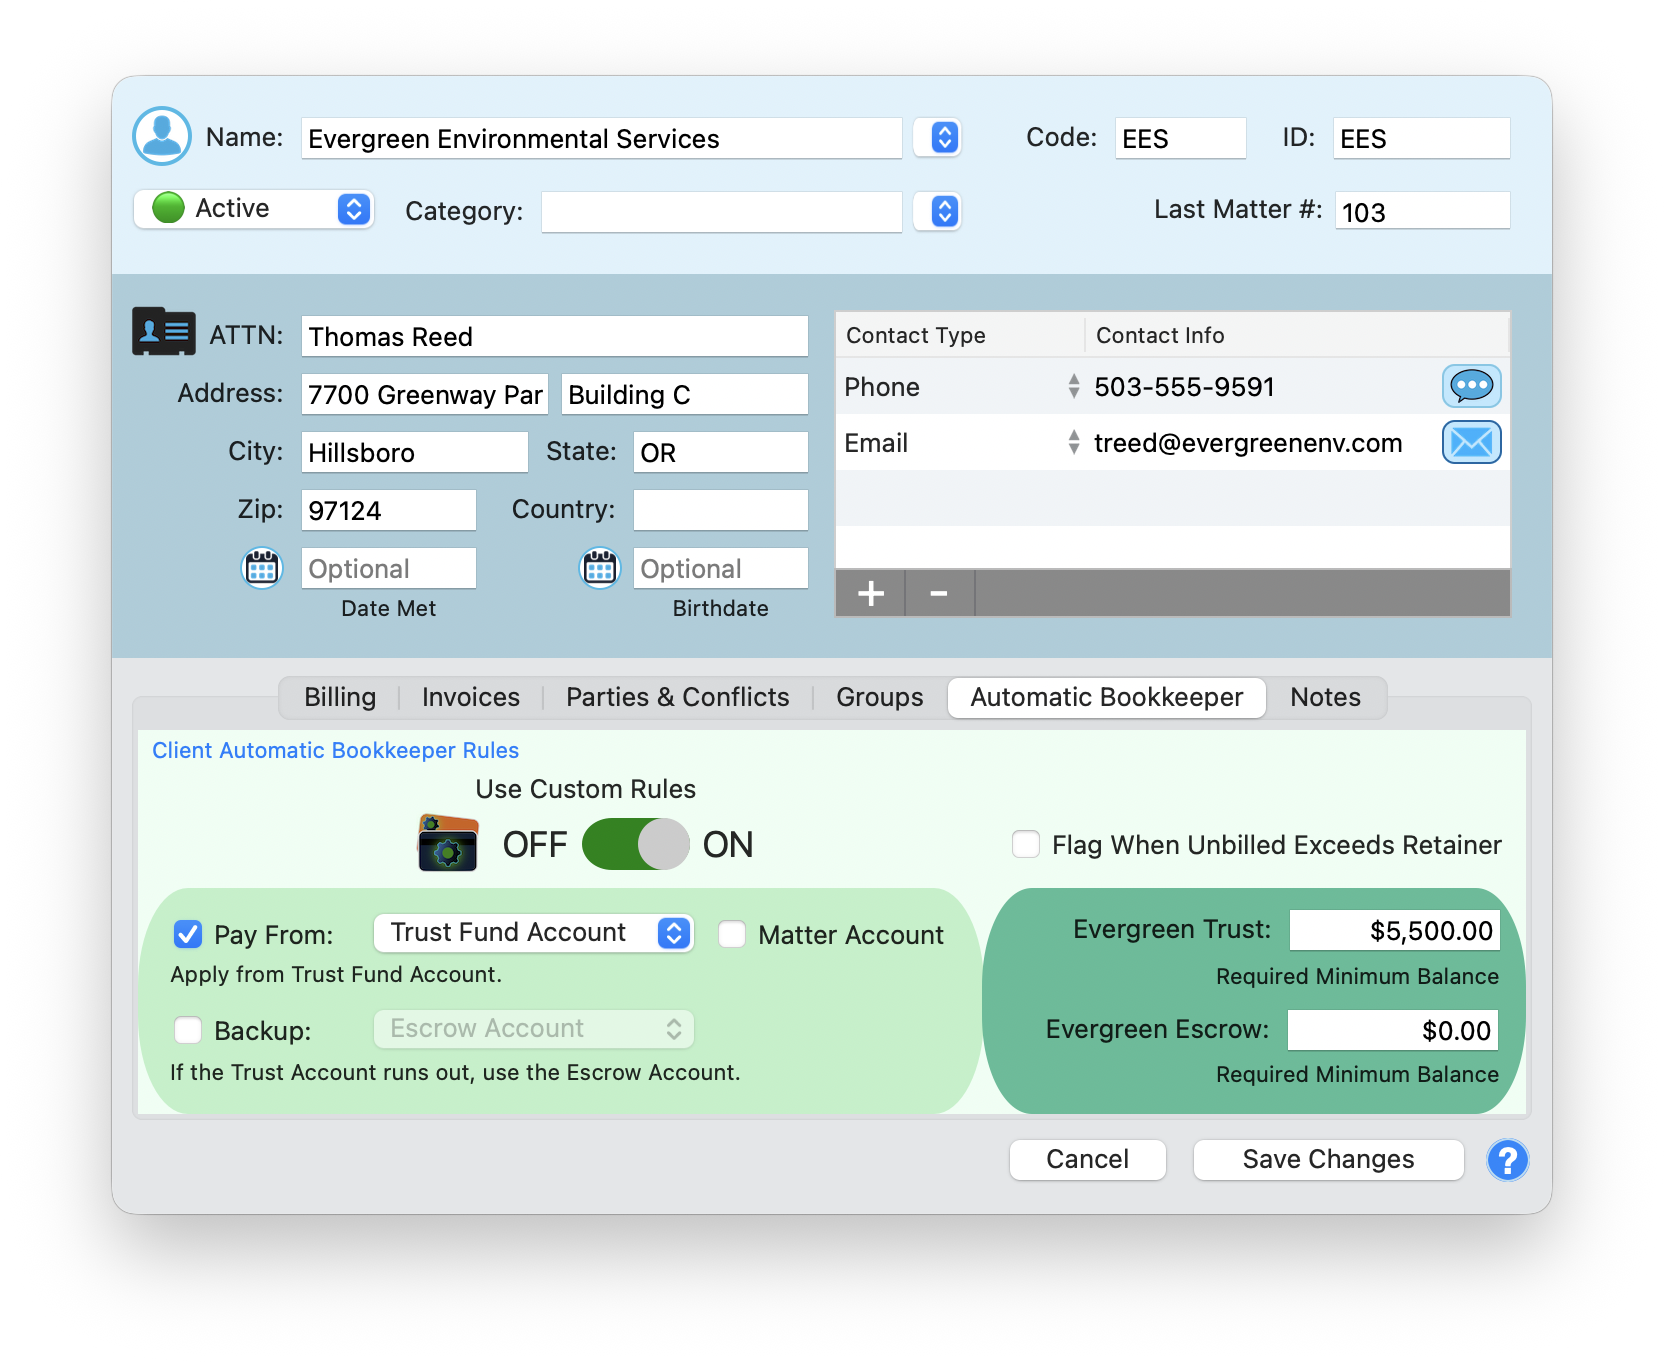
The Automatic Bookkeeper is one of the most powerful features in TimeNet Law. Set it up once per client and trust payments, escrow drawdowns, and minimum balance alerts all happen without manual intervention. If you manage retainers, this will save you serious time.
Notes Tab
The Notes tab is a free-form text area for anything that doesn't fit into structured fields. Engagement terms, special billing instructions, communication preferences, relationship history. Whatever you need to remember about this client, put it here.
Managing Clients
Changing Client Status
The Status dropdown in the header area controls whether a client is Active or Closed. Active clients show a green dot and appear in your default sidebar view. Closed clients are hidden from the sidebar but fully preserved. All data, matters, and history remain intact.
To close a client, open the Client Info Window, change the Status dropdown from Active to Closed, and click Save Changes.
Searching and Filtering
Closed clients are always accessible by toggling your sidebar filter to show closed clients, or by using the search bar. You never lose access to a closed client's records.
Keep exploring:
- Contact and Party Management - Track every person associated with your matters
- Conflict Checking - Run conflict checks across your entire client base
- Groups and Smart Groups - Organize clients into meaningful categories
- Multi-Currency - Bill international clients in their local currency
Need Help Setting Up Clients? Perry Can Help.
Walk through your client setup with Perry. He will get your client list organized in no time.