The Billing Center at a Glance
The Billing Center runs your firm's whole billing cycle in one window, for a single client or your entire roster at once. It has three tabs:
- One Click Billing: generate invoices for every matter with unbilled work (or a past-due balance) in a single pass.
- Client Statements: send statements and payment reminders, and batch-apply available retainer funds across clients.
- Invoices: every invoice your firm has issued, in one searchable list, where you can reissue, cancel, or batch-print them.
Open it from the Launchbar or the main toolbar. Everything below is logged and reversible: payments and applications are recorded in each matter's ledger and can be undone from the Event Vault.
One Click Billing
The One Click Billing tab lists every matter ready to bill, with its client, matter number, and combined Unbilled + AR total. Check the matters you want to invoice (or leave them all checked) and click Invoice Selected Matters.
The "Include matters with no new activity but a past due balance" checkbox
This is the quiet workhorse of monthly billing. With it on, a matter that has no new time or expenses but still carries an unpaid balance is pulled into the run. For those matters, TimeNet Law generates a simple statement showing what is still due and the dates it was billed, and applies any available funds in that client's auto-pay retainer account to those balances. In plain terms: clients who owe you but haven't run up new work still get a reminder, and any retainer money on hand is put to work automatically.
Clicking Invoice Selected Matters opens the Create Drafts sheet, where you set the run's options before anything is written:
- Draft or Finalize: drafts let you review before they hit the client's ledger; finalized invoices are ready to send.
- Invoice date, due date, and terms, applied across the whole batch.
- Balance Forward, Show Payments, Retainer Replenishment, and more, controlling exactly what each invoice shows.
- Email to clients, handing the finished batch straight to the drafting and email pipeline.
This is also where your Automatic Bookkeeper runs: as each invoice is generated, available retainer funds are applied to it (and to older balances), oldest first, per your firm's rules.
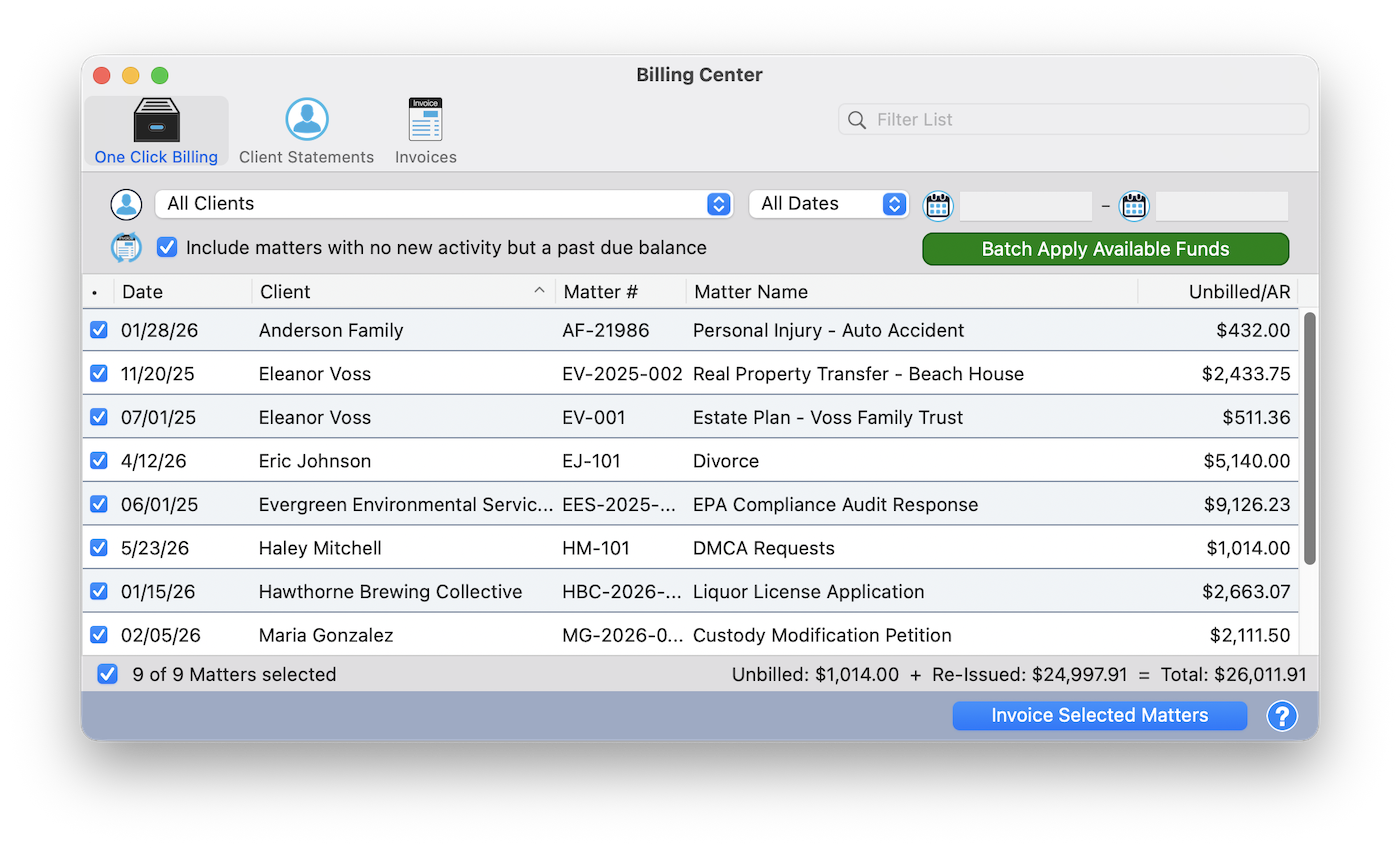
One Click Billing: check your matters, set the options, and invoice the whole batch at once
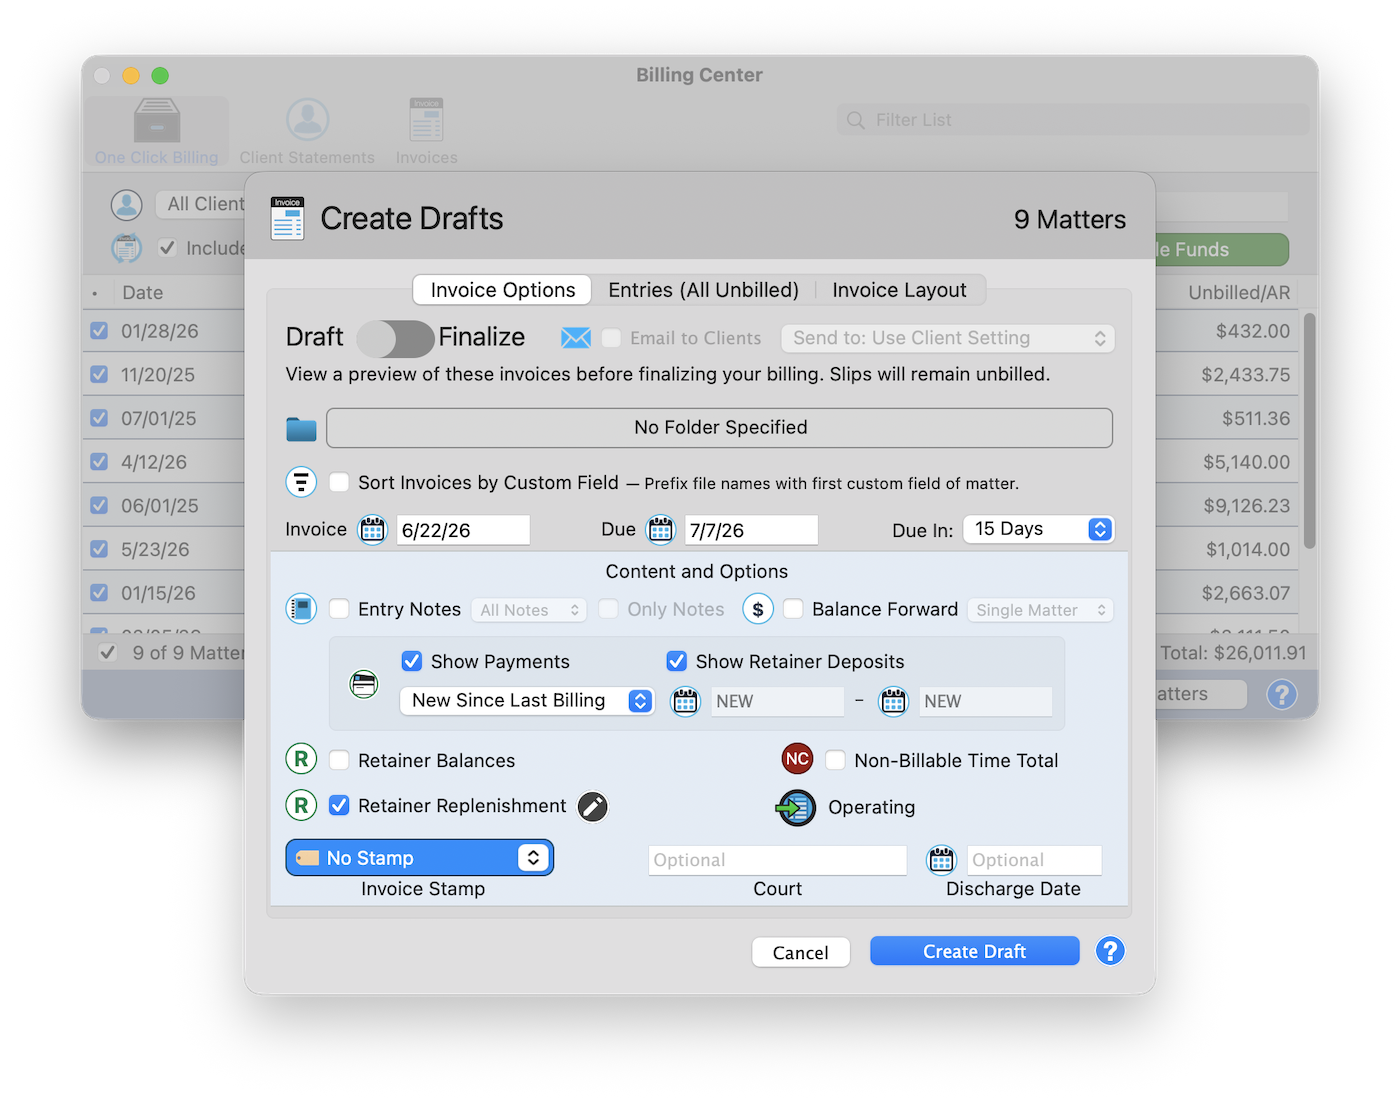
The Create Drafts sheet sets the options for the whole run before a single invoice is written
Batch Apply Available Funds
Mid-month, retainer checks come in and money piles up in trust, escrow, and UAC accounts while invoices sit open. The green Batch Apply Available Funds button clears that backlog across your whole roster in one move.
How it works
For every selected client, it applies their available retainer funds to their outstanding invoices, oldest first, following your Automatic Bookkeeper rules (which account to draw from, and whether to use client-level or matter-level funds). It is the same engine that runs at invoice time, now available on demand any time funds are sitting idle against a balance.
Step by Step
- On Client Statements (or One Click Billing), check the clients you want to apply funds for.
- Click Batch Apply Available Funds.
- A preview shows exactly what will happen before anything moves, for example: "Apply $55,166.08 across 6 client(s) and 9 invoice(s), oldest first?"
- Click Yes. Funds post to the right invoices, balances update, and a confirmation reports the total applied.
Every application is recorded in the matter ledger and reversible from the Event Vault. Clients with no available funds matching their open invoices are simply skipped. To apply funds for a single client instead, use the Apply Available Funds button in the Payment Center.
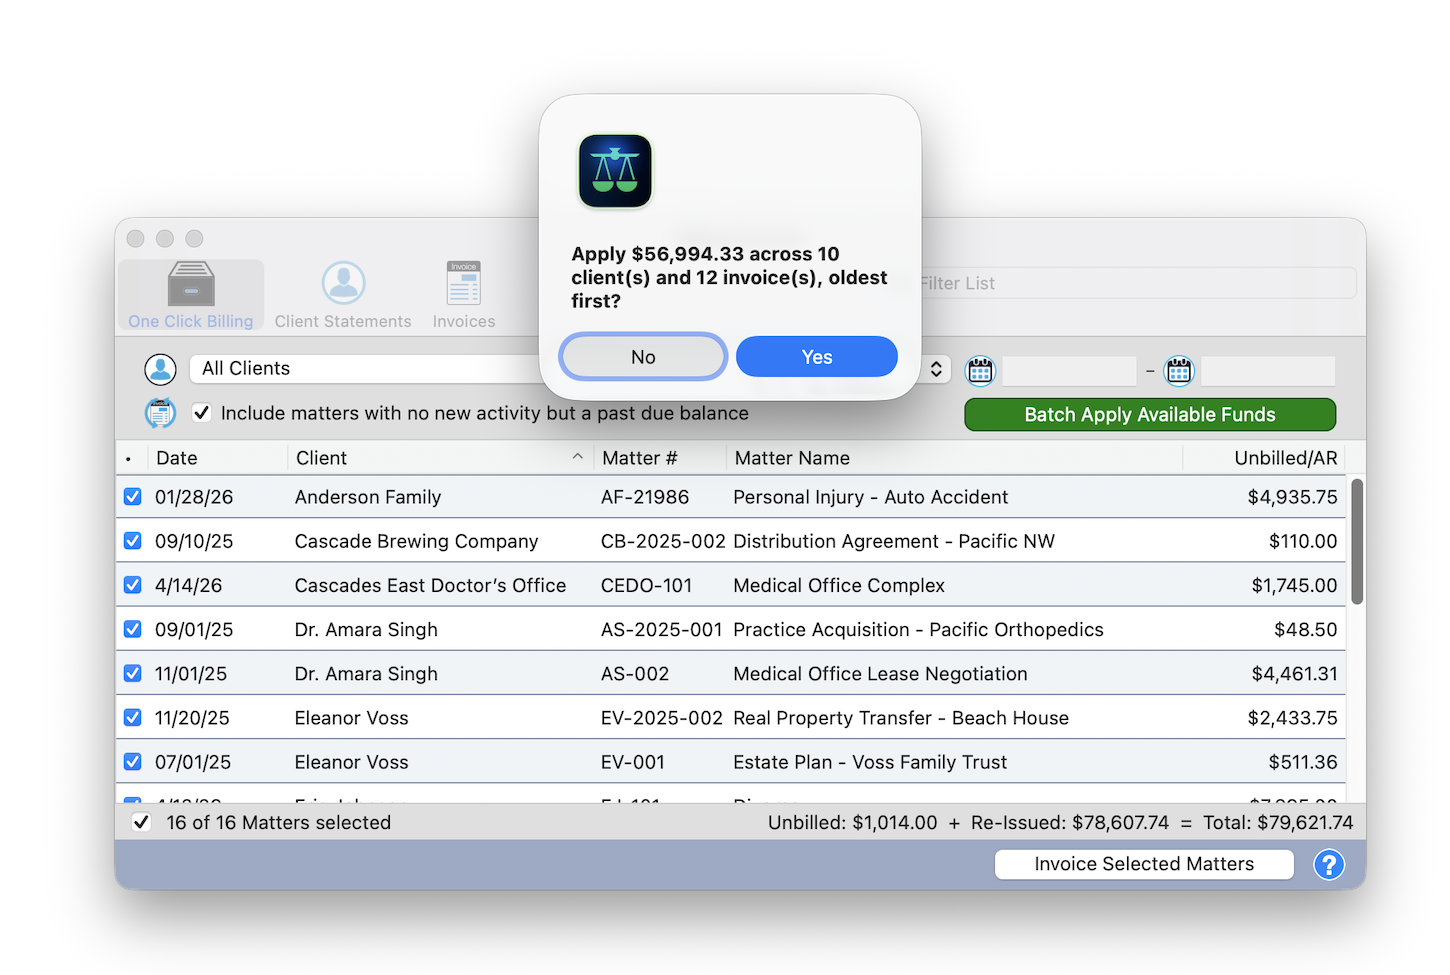
The sweep previews the whole run before it commits a dollar
Client Statements
The Client Statements tab is a client-level view of where everyone stands: Balance Due, Trust, Escrow, and UAC balances, plus recent payments, all in one grid. Clients shown in red have dropped below their required retainer minimum and need a replenishment request.
Check the clients you want and click Generate Statements for Selected Clients to produce statements or email reminders in a batch. Because this tab shows each client's available funds right next to their balance, it is also the natural home for the Batch Apply Available Funds sweep above: you can see who has money to apply before you apply it.
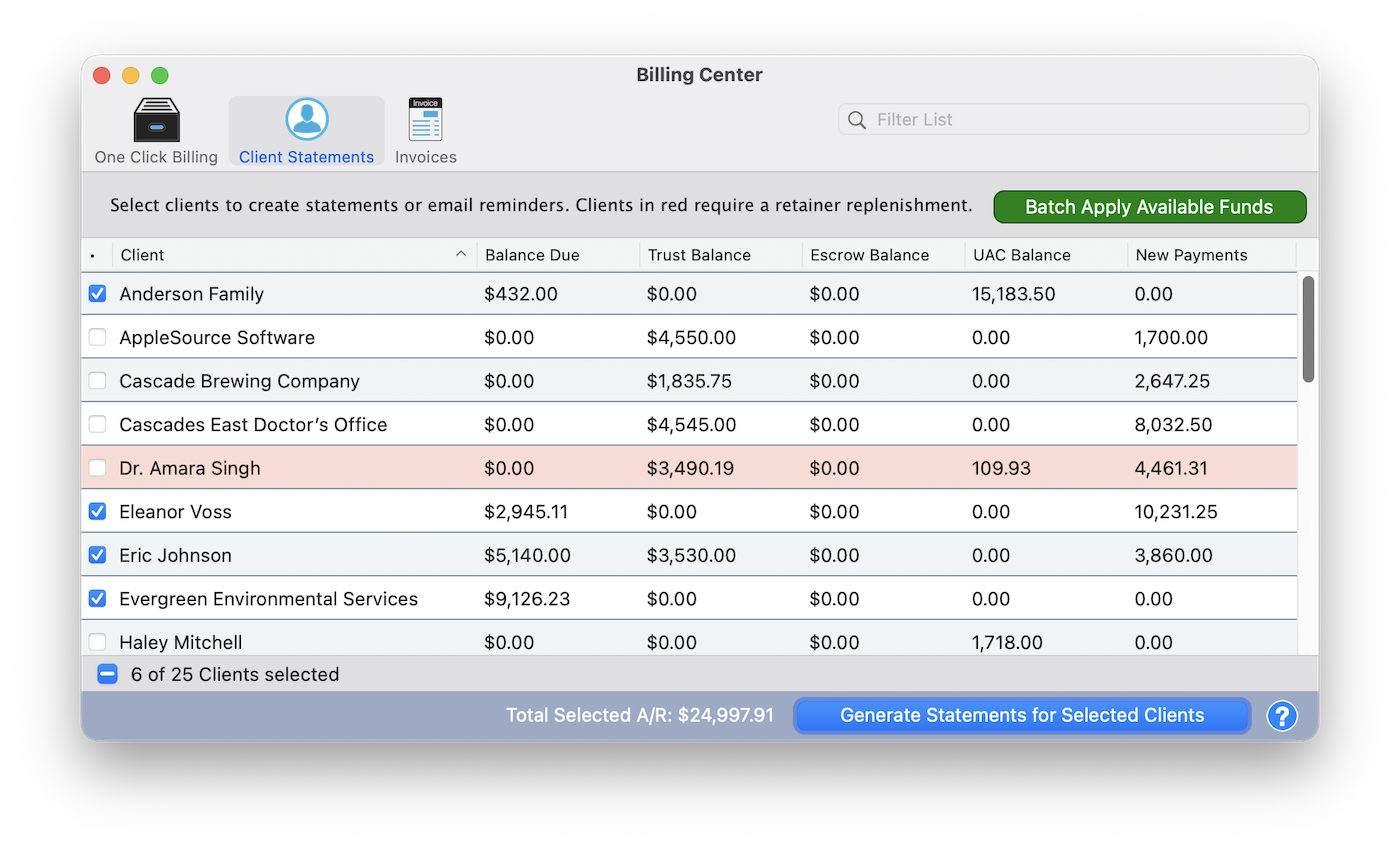
Client Statements: balances and available funds side by side, with replenishment flags in red
The Invoices Panel
The Invoices tab is the full history of every invoice your firm has issued, with columns for Invoice number, Client, Matter, Date, and Balance, and a running Overdue total at the bottom. Use the filters and the Hide Paid Invoices toggle to focus on what is still open.
Right-click to reissue or cancel
Right-click any invoice in the list to act on it. Reissue regenerates the invoice, handy when a client lost their copy or you want to re-send after a payment posts; if your firm auto-applies funds, reissuing an open invoice also applies any available retainer funds to it. Cancel voids the invoice and returns its entries to unbilled so you can re-bill them. Both actions are recorded and reversible.
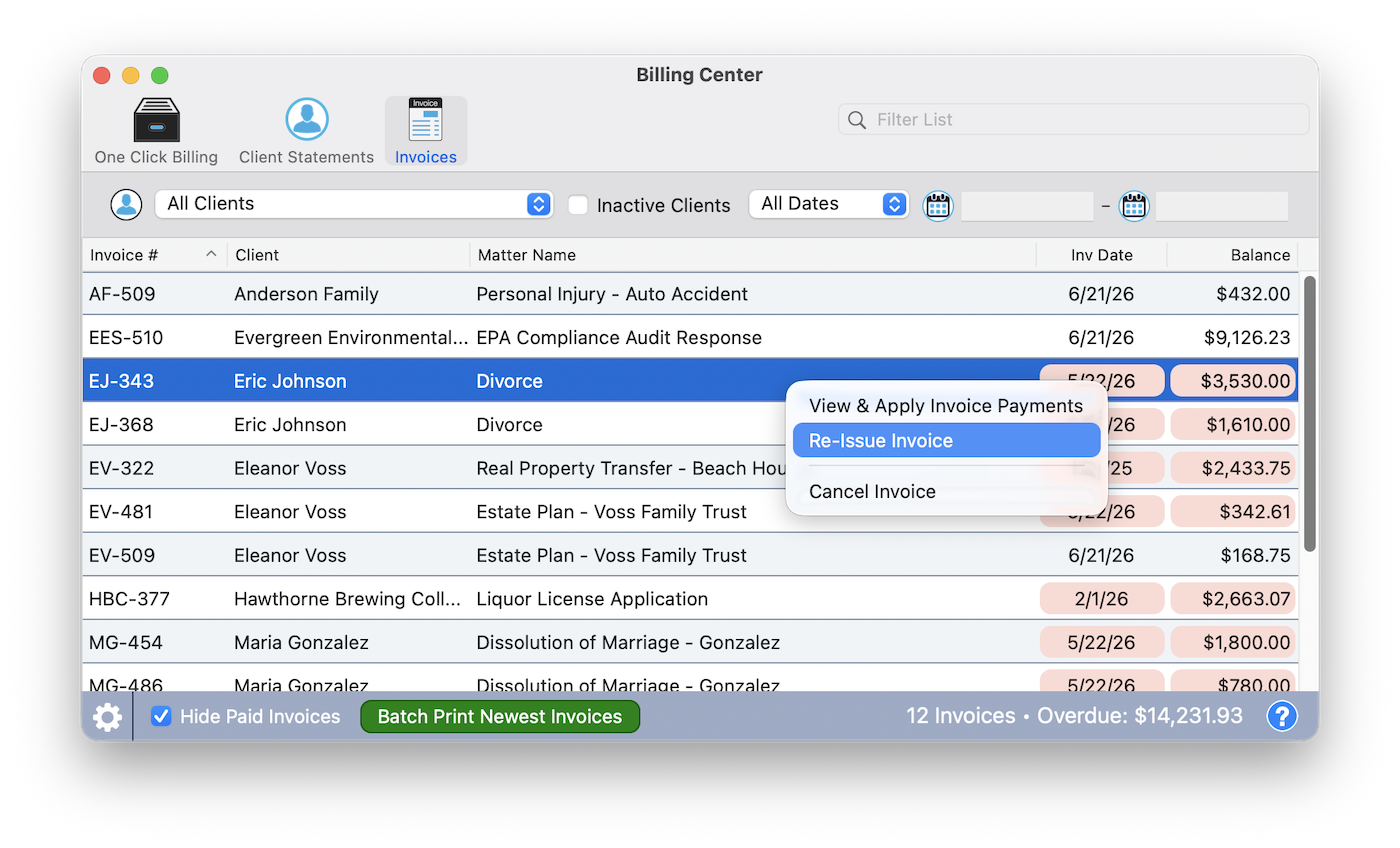
Right-click any invoice to reissue or cancel it
Batch Print Newest Invoices
Generated a batch of invoices and need paper copies for the ones you mail? Instead of digging through each matter's folder, click Batch Print Newest Invoices at the bottom of the Invoices tab.
It gathers the most recent invoice for each matter in the list and sends them to your default printer in one job. A confirmation tells you how many it found first, for example: "Print 48 invoice(s) to your default printer?" Draft invoices are skipped, so only the finalized copies you would actually send go to the printer.
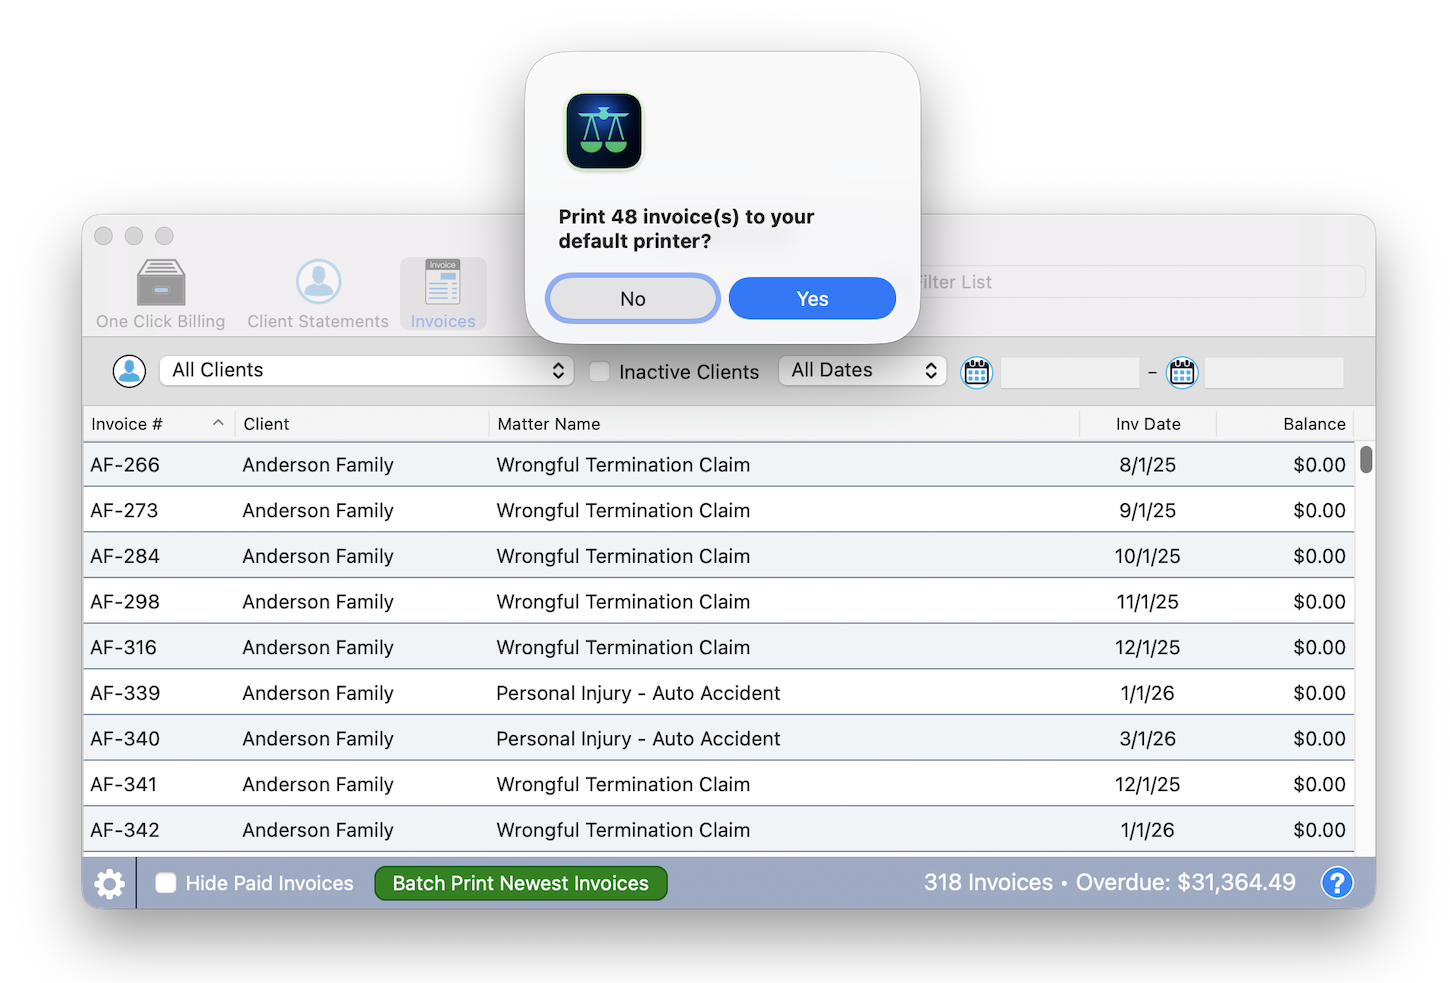
One click gathers the latest invoice for every matter and sends them to print
Best Practices
Pro Tip: Pick a billing day and run the whole cycle
On the same day each month, open One Click Billing, leave "include past-due matters" on, and invoice the batch. Then hop to Client Statements, hit Batch Apply Available Funds to clear idle retainer money, and Generate Statements for anyone still owing. The month's billing is done before your coffee is cold.
Pro Tip: Review unbilled time first
Run a quick pass for missing time entries before you bill. Catching a gap before the invoice goes out beats a correction after.
Pro Tip: Preview before you commit
Generate as drafts when a matter is complex or a client is new, and read the Batch Apply preview before clicking Yes. Both let you see exactly what will happen before anything is written.